
Knowing how to grow chives is a great way to get started with herb gardening. They are the gateway herb for beginners; they require very little care and offer the most flavor. I started with one pot on my apartment balcony. That one plant survived my early gardening mistakes.
You will find these tough plants rewarding and beneficial for three reasons. They provide culinary fireworks, they bring in pollinators with purple blooms, and they come back every year without replanting. This guide walks you through the process from variety selection to harvesting. We refrain from jargon so you can succeed right away.
Choosing the Right Chive Variety
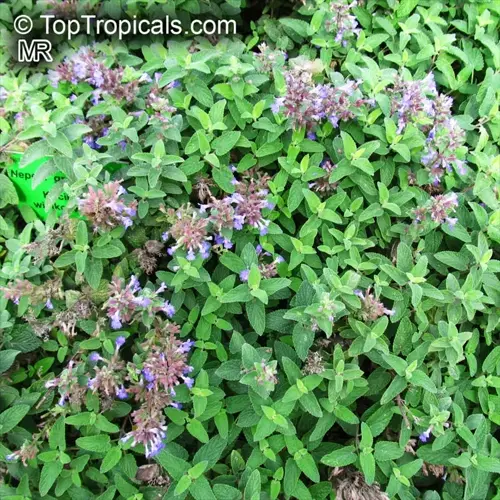
Chive variety choices influence the flavor and aesthetics of your garden. Common chives have a mild onion flavor and hollow leaves with purple flowers. Garlic chives have stronger flavor and flat leaves with white flowers. I grow both for a variety of uses in the kitchen. Each adds flavor to different flavors beautifully.
Consider your climate when selecting varieties. Common chives do well in zones 3-9, while garlic types fare better in warmer zones 4-9. Flowering times also provide an opportunity for continuous garden colour. Common chives bloom in the early summer months. Garlic types are late bloomers, providing visual continuity. Select varieties that suit your specific needs, such as those that are well-suited for your particular zone.
Use their leaf structure for identification. Common chives have hollow tubular leaves. Garlic chives have flat grass-like leaves. The flowers are different, too, purple pom-poms versus star-shaped white clusters. I plant them together so they contrast in texture. Both look great, and I get different harvests.
Ideal Growing Conditions Simplified
Chives are adaptable in terms of light, which adds to their versatility. They like six hours of sunlight each day but also adapt to partial shade. A north-facing window worked fine for my plants. Providing morning sun with afternoon shade protects them from heat stress in hot areas. Temperature is also important for their development. The ideal temperature range is 55°F to 75°F (13°C - 24°C) for optimal growth. Temperatures below 39°F (4°C) cause dormancy, and temperatures above 84°F (29°C) cause slow growth.
Soil preparation is crucial to the success of chives. Amend garden beds with 30% compost for draining and nutrients. This will provide an optimal environment for root growth. I learned this the hard way when plants were entirely lost to clay soil that was flooded with water. In containers, mix potting soil with perlite and worm castings. Maintain the soil's pH level between 6.0 and 7.0 to ensure nutrients are readily accessible.
Use the finger test method to perfect your watering technique. Stick your finger into the soil, up to the first knuckle, and only water when the soil feels dry to that depth. Watering deeply encourages strong roots that go down about 6 inches (15 cm). Do not wet the leaves when watering to prevent fungal diseases. My plants thrived with this simple method.
Sunlight Needs
- Full sun required: Minimum 6 hours of direct sunlight daily for optimal growth
- Partial shade tolerance: Chives survive with 4 hours of sun but produce fewer leaves
- Indoor adjustment: Rotate pots weekly for even light exposure near south-facing windows
Soil Composition
- Drainage critical: Use sandy loam amended with 30% compost to prevent waterlogging
- pH balance: Maintain 6.0-7.0 range using lime (raise) or sulfur (lower) if needed
- Container mix: Combine potting soil with perlite and worm castings for nutrient retention
Temperature Range
- Growth sweet spot: 55°F to 75°F (13°C to 24°C) for vigorous leaf production
- Dormancy trigger: Below 39°F (4°C) causes dieback; above 84°F (29°C) slows growth
- Frost protection: Apply 3-inch straw mulch when temperatures approach freezing
Water Management
- Finger test method: Water when top 1 inch (2.5 cm) of soil feels dry to the touch
- Deep watering: Apply slowly until moisture reaches 6 inches (15 cm) depth to encourage deep roots
- Container care: Use pots with drainage holes; empty saucers after watering
Spacing Requirements
- Garden planting: Allow 8-12 inches (20-30 cm) between plants for air circulation
- Container depth: Minimum 8-inch (20 cm) pots for single plants; 12-inch (30 cm) for multiple clumps
- Division spacing: Replant divisions 6 inches (15 cm) apart after splitting overcrowded clumps
Temperature & Humidity
- Growth sweet spot: 55°F to 75°F (13°C to 24°C) for vigorous leaf production
- Dormancy trigger: Below 39°F (4°C) causes dieback; above 84°F (29°C) slows growth
- Humidity preference: 40-60% relative humidity for optimal growth
- Frost protection: Apply 3-inch (7.6 cm) straw mulch when temperatures approach freezing
How to Grow Chives Step by Step
Take care of your soil carefully for the best results. Mix in three inches of compost into the top six inches of garden soil. For container mix 70% potting soil, 20% perlite, and 10% worm castings. This gives the best drainage and nutrition. I learned this formula through trial and error over the course of three seasons. Good soil prevents root rot and promotes growth.
Every three years, mature plants can be propagated using the clump splitting method. Dig up the entire plant and carefully break apart bulbs into sections. Every new division must have three bulbs to thrive properly. Place divisions six inches apart in fresh soil. This not only revitalizes the plants but also increases production exponentially.
Chives get proper nutrition from adjusted rates of fertilizer. In-ground plants get half-strength 5-10-5 fertilizer each spring. Container plants require quarter-strength monthly feedings when they are actively growing. Too much fertilizer gives you weak, flavorless leaves. I had greater luck with my plants by cutting back on feeding. Depending on your climate, you will overwinter your plants. In cold zones, mulch your ground plants with 4 inches (10 cm) of mulch before the first frost. Containers can be moved to sheltered areas when the temperature drops below 25°F (-4 °C).
Soil Preparation
- Amend garden beds: Mix 3 inches (7.6 cm) compost into top 6 inches (15 cm) of soil
- Container mix formula: Combine 70% potting soil + 20% perlite + 10% worm castings
- pH adjustment: Test soil annually; add lime if below 6.0 or sulfur if above 7.0
Planting Process
- Seed sowing depth: Plant ¼ inch (0.6 cm) deep, 6 inches (15 cm) apart after frost danger passes
- Germination timeframe: Seeds sprout in 7-14 days at 60-70°F (15-21°C)
- Transplant handling: Set root balls level with soil surface, firm gently around stems
- Watering start: Soak soil thoroughly after planting to settle roots
Early Growth Care
- First feeding: Apply 5-10-5 fertilizer at ½ strength 4 weeks after planting
- Mulching technique: Spread 2-inch (5 cm) straw layer leaving 1-inch (2.5 cm) stem clearance
- Pest watch: Inspect weekly for aphids; spray with water at first sight
Mature Plant Maintenance
- Regular harvesting: Cut outer leaves at soil level when 6 inches (15 cm) tall
- Bloom management: Remove flower stalks after fading to boost leaf production
- Summer watering: Deep soak every 3-5 days during drought periods
Seasonal Adjustments
- Fall preparation: Apply 4-inch (10 cm) mulch before first frost
- Container overwintering: Move pots to unheated garage when temperatures drop below 25°F (-4°C)
- Spring revival: Cut back dead foliage and fertilize when new growth emerges
Division & Propagation
- Timing: Divide clumps every 3 years in early spring
- Technique: Dig entire plant, split into 3-bulb sections with clean knife
- Replanting: Set divisions 6 inches (15 cm) apart in refreshed soil
Troubleshooting Common Issues
Recognizing issues utilizes their unique visual manifestations. Aphids arise as green clusters covered in sticky material, and powdery mildew appears as white fungal patches on the surface. Thrips appear as silver streaks on leaves. Root-rot plants droop, although they share wet soil and smell awful. I identify plant disturbance based on symptoms, with the visual cue being the material symptoms.
Always give organic options a try* first before using chemicals. When it comes to aphids, spray them with strong jets of water. Use neem oil only as a last resort for an outbreak of aphids or other issues. Baking soda solutions work well against powdery mildew. I would say better air circulation will prevent even that. I stopped using chemicals some years ago and saw all the beneficial insects return.
Relate symptoms to their environmental causes. Leggy growth is indicative of insufficient light, whereas yellow leaves are frequently the result of pH problems. Heat stress results in midday wilting and brown tips. Control these through proper spacing and soil preparation. I saw my plants recover much more quickly when I addressed root causes rather than symptoms.
Harvesting and Preserving Essentials
Harvest chives at the optimal flavor stage, when the leaves are 6-8 inches tall. Ideal timing is mid-morning, after the dew has dried and before the heat becomes too intense. Cut the outer leaves at the soil level, while leaving an inch of stubble at the soil level to promote regrowth. I harvest every 2 weeks to have a continuous supply. Rinse in cold water after harvesting and tap dry for best results.
To best preserve flavor, observe the following method. Freezing preserves freshness better than any other method: after chopping your leaves, spread them onto trays to flash-freeze, after which you can store them in an airtight container for up to six months. Do not traditional-dry your product that destroys the delicate oils. My preference is to INFUSE your chopped chives in high-quality olive oil for three days, and then refrigerate. For seasonal use, there will be dried chive blossoms, dried upside down.
Pick edible flowers that are completely open, but before they set seeds. Separate the purple florets for salads or infuse the whole flower into vinegar. Use 1 cup flowers per 2 cups vinegar and steep for two weeks. Dried flowers can be stored in glass jars for one year. I can preserve flowers in different ways than leaves for unique food pairings.
Optimal Harvest Timing
- Leaf maturity: Cut when leaves reach 6-8 inches (15-20 cm) for peak flavor
- Time of day: Harvest mid-morning after dew dries but before heat intensifies
- Frequency: Regular cutting every 2-3 weeks encourages continuous regrowth
Fresh Handling Techniques
- Cutting method: Use scissors to snip at soil level, leaving 1 inch (2.5 cm) stubble
- Cleaning process: Rinse immediately in cold water; pat dry with paper towels
- Immediate use: Incorporate within 2 hours for maximum flavor in dishes
Freezing Preservation
- Preparation: Chop leaves into ¼-inch (0.6 cm) pieces; spread on tray to flash-freeze
- Storage method: Transfer to airtight containers; remove air with vacuum sealer if possible
- Shelf life: Retains flavor for 6 months; use directly from freezer without thawing
Blossom Harvesting
- Timing: Pick when flowers fully open but before seeds form
- Culinary uses: Separate florets for salads; infuse whole blossoms in vinegar
- Infusion ratio: Use 1 cup blossoms per 2 cups vinegar; steep for 2 weeks in dark place
- Preservation: Dry upside-down in dark place; store in glass jars for 1 year
Flavor Preservation Tips
- Avoid drying: Traditional dehydration destroys volatile oils and flavor compounds
- Oil infusion: Steep chopped chives in olive oil for 3 days; strain and refrigerate
- Butter incorporation: Mix ½ cup chopped chives per stick of softened butter; freeze logs
5 Common Myths
Chives need full sun all day to do well.
While chives like full sun best, they also do well in partial shade as long as they receive 4-6 hours of sunlight. This is why they are also a good option for balcony or indoor gardens where the light is not bright and intense all day. The growth may slow down in the shade, but they will still produce edible leaves without the stress of sun.
Chive plants are permanently killed by frost.
While chives are hardy perennials, they die back in freezing temperatures but should come back from underground bulbs each spring. Covering them with 3 inches of mulch before winter will protect the root system. Because of their dormancy, they can survive for years in USDA zones 3-9. When the temperatures rise, chives will "break dormancy" and begin to grow again.
Harvesting chives frequently will weaken and kill the plants.
Regular harvesting actually stimulates new growth by preventing flowering energy diversion. Cutting outer leaves at soil level when they reach 6 inches encourages continuous production. This practice mimics natural grazing patterns and can extend the productive season by several months compared to uncut plants.
Cultivating chives in a container greatly reduces their potential yield.
When container-grown chives are supplied with adequate nutrient and root space, they can be produce massive yields. A 12 inch deep container filled with well-draining soil supports vigorous chive plant growth equals to that of chives grown in a garden. Additionally, dividing plants every 3 years will help keep them at peak vigor for many years, and many gardeners report better leaf production in containers versus outdoor garden settings.
Monthly heavy fertilization is needed to keep chives growing well.
Chives are light feeders and require little fertilization; you would apply balanced 5-10-5 fertilizer at half-strength only once in early spring. Any more than that and you will have chives growing long, weak, and flavorless while making the plant more susceptible to diseases they would not have if not for over fertilization. If, however, you grow them in nutrient-rich soil that has been amended with compost, chives may not need any supplemental feeding for the whole growing season.
Conclusion
Chives are the best low-maintenance herb for any gardener. They make mistakes and still grow, and they really don't ask for much to thrive. I had a chive plant that bounced back from weeks of neglect while I was on vacation. Because of this, I would recommend chives to gardeners of all levels, from experts to beginners. Chives can be kept anywhere from windowsills to pots and garden beds.
Savor their triple advantages every year. Delight in their constant harvesting through routine trimming. Reap the rewards of organic pest resistance in the garden. Enjoy the culinary versatility with fresh and preserved leaves. I use them in soups, salads, and compound butters, to name a few. Their light onion flavor lends itself so easily to many types of cooking.
Experiment with various methods of growing your herbs. Consider using containers on your balcony, or try interplanting vegetables with other plants for added interest. Experiment with preservation methods, such as freezing or oil infusion. Go each week this season and plant some chive seeds, or divisions. You will taste the difference. Begin your new life as a rewarding grower of chives and other herbs today.
External Sources
Frequently Asked Questions
What's the essential secret to growing healthy chives?
The key is providing proper sunlight exposure and well-draining soil. Chives need at least 6 hours of daily sun and soil enriched with organic compost. Consistent moisture without waterlogging and regular harvesting also significantly boost growth. Maintaining these conditions ensures vigorous plants.
Do chive plants return annually or require replanting?
Chives are perennial herbs that return yearly through dormancy cycles. Their underground bulbs survive winter when protected by mulch in colder zones. Each spring, new growth emerges vigorously without replanting. This makes them ideal low-maintenance additions to gardens.
How should chives be harvested for continuous growth?
Follow these proper harvesting techniques:
- Cut outer leaves at soil level using sharp scissors
- Harvest when leaves reach 6-8 inches tall
- Never remove more than one-third of the plant at once
- Regular cutting every 2-3 weeks prevents flowering
- This stimulates constant new leaf production
What companion plants should be avoided near chives?
Chives compete poorly with certain plants. Avoid planting them near beans, peas, or other alliums like onions. These combinations increase disease risk and stunt growth. Instead, pair with carrots or tomatoes for mutual benefits like pest reduction and enhanced flavor.
Can chives thrive in container gardens?
Containers are excellent for growing chives when these conditions are met:
- Use pots with minimum depth and drainage holes
- Select quality potting mix amended with compost
- Ensure daily direct sunlight exposure
- Water when top soil layer dries out
- Divide overcrowded clumps every few years
What pests commonly affect chive plants?
Chives face several common pests:
- Aphids: Cluster on new growth causing distortion
- Thrips: Create silvery streaks on leaves
- Onion maggots: Damage roots in wet conditions
- Organic solutions include neem oil sprays
- Prevent with proper spacing and airflow
How can I encourage thicker chive growth?
Thicker growth results from optimal care:
- Divide mature clumps every 3 years in spring
- Ensure adequate sunlight exposure daily
- Apply balanced fertilizer at season start
- Maintain consistent soil moisture levels
- Regular harvesting stimulates denser foliage
What's the best preservation method for chives?
Freezing preserves flavor best compared to drying. Chop fresh leaves, spread on trays to flash-freeze, then transfer to airtight containers. Alternatively, infuse in oils or blend into butter. Avoid traditional dehydration which destroys delicate flavors. Properly stored, frozen chives retain quality for months.
Why might chive seeds fail to germinate?
Germination issues typically stem from:
- Planting seeds too deeply in soil
- Inconsistent moisture during sprouting phase
- Temperatures outside ideal range
- Poor quality or old seeds
- Lack of patience - germination takes time
Do chives offer pest-repelling benefits in gardens?
Chives naturally repel certain pests through their scent compounds. They deter aphids, Japanese beetles, and carrot flies when planted near susceptible crops. However, they don't eliminate all pests and aren't effective against rodents. Use them as part of integrated pest management with other strategies.