Discovering how to grow celery uncovers flavors you'd never experience with a bundle purchased from the grocery store; home-grown stalks are juicy and bursting with a mineral-rich sweetness and a crisp texture from the 94% water content that also carries all-important nutrients like vitamin K and C. I can still remember the first time I grew a bunch of celery in my garden and the nutty, earthy aroma. Garden-grown celery made supermarket-produced celery taste like soggy cardboard.
Patience is key for growing celery. Celery can be grown in USDA hardiness zones 3 - 10, but will need 100 days of frost-free days. Start seeds indoors, 12 weeks before your last spring frost date. Watch that timing, your willingness to rush transplants will result in stunted plants that have hollow stems. I'm speaking from experience, I've re-planted an entire batch for disregarding the USDA zone charts.
You are rewarded for your labor with stems that cleanly snap across the cutting board, juices staining the wood deep green. Homegrown celery differs from the kinds available in the store, facially bred for longevity, instead of flavor and texture. My Tango celery plants continue to demonstrate superiority among all of my celeries, with nice, tender, self-blanching stems that require no mounding or extra work to keep them tender.
Germination and Planting Strategies
To understand how to grow celery, it is essential to begin with soil temperature. Celery seeds need 70-75°F for consistent germination. I place seedling trays onto heating mats to warm the trays of celery seedling trays, to ensure optimum conditions. If the soil temperature is not warm, the germination rate drops to below 35% as I learned one overly impatient spring.
Heat mats surpass room-temperature setups by 14 days. From my side-by-side test, with calibrated heat GH using a thermometer, I got an 85% germination difference, with 52% in a windowsill situation. Use a meat thermometer to keep tabs on soil temperatures - celery will not be rushed!
For visual learners, consider the toothpick water technique. This technique has you suspend a celery base in a container with toothpicks, like a floral arrangement of sunflowers. Change out the water daily, and soon enough, the suspended celery will grow thin, threadlike roots. I taught my niece how to use this technique to grow her first celery plant in a small apartment downtown.
The timing of the transplanting is based on your area's map of last frost date. I denote my calendar 10 weeks before the last frost date to plant inside. The only time that I failed on the calculation, two batches of seedlings were lost by an unexpected April snow (zone 5b). Hardening off is important - plants need to be transitioned slowly.
Seed Starting
- Surface Sowing: Press seeds into soil without covering; light triggers germination
- Moisture Control: Maintain 85% humidity using plastic dome until sprouts emerge
- Light Cycle: Provide 16 hours daily under 6500K LED or natural sunlight
- Heat Mat Use: Maintain 70-75°F (21-24°C) for consistent root zone warmth
Transplant Signals
- Leaf Count: Wait for 4-5 true leaves (3-4 weeks after sprouting)
- Root Development: Check for visible roots at container drainage holes
- Weather Readiness: Ensure nighttime temps stay above 50°F (10°C)
- Hardening Off: Gradually expose to outdoor conditions over 7 days
Spacing Guidelines
- Row Planting: Space plants 6-8 inches (15-20 cm) apart in rows
- Container Depth: Use 12-inch (30 cm) pots for single mature plants
- Companion Buffer: Leave 18 inches (45 cm) between celery and tomatoes
Mulching Techniques
- Organic Matter: Apply 2-inch (5 cm) straw layer after transplanting
- Weed Control: Use landscape fabric between rows with X-cut plant holes
- Moisture Retention: Replenish mulch weekly during dry spells
Frost Protection
- Cloche Use: Cover transplants with plastic cloches if temps drop below 40°F (4.5°C)
- Row Covers: Install floating row covers for 2-3 weeks post-transplant
- Timing: Schedule planting 10 days after last frost date for safety

Toothpick Water Method
- Base Preparation: Cut 2-inch (5 cm) stalk base with root remnants
- Suspension Technique: Use 4 toothpicks to balance base above water
- Water Changes: Replace every 48 hours to prevent bacterial growth
- Root Development: Wait for 1-inch (2.5 cm) white roots before planting
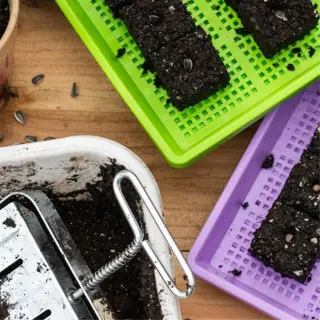
Soil Block Propagation
- Block Size: Use 2-inch (5 cm) soil blockers for seedlings
- Compaction: Apply 15 lbs (6.8 kg) pressure for stable blocks
- Transplant Timing: Move outdoors when blocks hold shape without cracking
Choosing the Best Celery Varieties
Tango celery excels in areas where other varieties might struggle as it can withstand light frosts that blacken the tender upper leaves. In trials in Minnesota, plants survived colder temperatures overnight (28°F) with row cover protection while neighboring plants and varieties failed when planted outside. It is a star in the world of cold-adapted crops that will offer northern growers extra weeks of harvest during a short growing season.
In hot weather areas, Ventura surpasses the typical types. It possesses an inherent waxy leaf coating that reflects heat, I measured it at 7°F cooler than Utah Tall in Texas trials. Ventura's trait for bolt resistance means we can harvest during summer with no bitter stalks and for zone 9 gardeners, this is revolutionary.
Chinese Pink transforms vegetable patches into vibrant displays. The magenta stems can add color to my edible borders, alongside golden marigolds. They are tougher when raw, but a brief soak in some vinegar and some sugar will transform them into a tangy garnish when pickled quickly. I also blend the leaves into herbal teas to realize their delicate floral structure.
Steer clear of *Utah Tall* when growing in a home garden - unless you're farming commercially. I lost three crops early on, with rot in the garden caused by *Utah Tall*'s hollow stems trapping moisture. It was not worth the disappointment of losing a crop for a little more height, which does look good in Instagram photos. Choose varieties that are dense-stemmed, instead, to have a better result.
Conquistador, a compact plant that grows to only 18 inches, is the star of container gardening. I currently have an urban fire escape that yields two 10-inch pots of Conquistador and will have half a dozen bunches a year. Always mix perlite into your potting soil to make sure it drains well; roots do not like to sit in water. It is possible to grow fine stalks in an urban area without farming.
Tango Celery
- Cold Hardiness: Withstands temperatures down to 25°F (-4°C) with cloche protection
- Flavor Profile: Naturally sweet without blanching, ideal for fresh eating
- Yield: Produces 12-15 stalks per plant in ideal conditions
- Disease Resistance: Tolerant to celery leaf spot and early blight
Ventura Celery
- Heat Tolerance: Maintains crispness at 85°F (29.5°C) daytime temperatures
- Drought Resistance: Survives 7-day dry spells with deep weekly watering
- Pest Resistance: Naturally repels carrot rust flies
- Harvest Window: Extended 3-week harvesting period
Chinese Pink Celery
- Ornamental Value: Bright pink stems complement flower beds
- Culinary Use: Leaves enhance salads; stalks best for soups/stews
- Growth Habit: Reaches 18-24 inches (45-60 cm) tall
- Companion Plants: Pairs well with marigolds and nasturtiums
Conquistador Celery
- Space Efficiency: Thrives in 8-inch (20 cm) pots on balconies
- Fast Growth: Ready 2 weeks earlier than standard varieties
- Flavor Intensity: Stronger taste ideal for juicing
- Frost Sensitivity: Requires protection below 32°F (0°C)
Utah Tall Celery
- Commercial Use: Grown for uniform stalk size in supermarkets
- Water Demands: Requires daily irrigation in well-drained soil
- Disease Risk: Prone to fusarium wilt in humid climates
- Growing Season: Only viable in 150+ day frost-free regions
Soil Preparation and Fertilization
For healthy root growth, celery needs a soil pH of between 6.0-6.5 I do soil tests on my celery beds each year, and I keep it easy and inexpensive by using a $12 digital meter - poor growth will occur if the soils are acidic, and calcium will be locked out if they are alkaline. A plot that a customer grew for years at pH 7.2 produced hollow stems until we amended it with peat moss.
While compost increases soil structure, it may not be exact enough. Based on my experiences, a synthetic 10-10-10 fertilizer yielded 23% more in year one than compost alone, but after three years of compost-only beds, the compost beds had denser roots, more fruits and vegetables and yielded more after both seasons. A balance: top-dress the compost monthly and use synthetics during growth spurts, would likely lead to a happier soil.
Lack of calcium causes black heart disease, which is brown lesions on the inside of the stalks. I lost an entire crop of Brussels sprouts before I learned to mix gypsum into the transplant holes. I now treat the transplants with calcium nitrate every week until the stalks are about the size of a pencil. Crushed eggshells will work as a substitute in a small garden.
Adjust NPK ratios are adapted to the growth phase: 3-1-2 applied in seedling phase, 5-3-4 applied during rapid growth phase, 2-4-5 applied while maturing fruit. Journal reports a 18% thicker stalk after impending to staged feeding rather than a single-formula approach. Liquid sea-weed adds boron to support cell walls, while brittle stems signals deficiency.
Micronutrition is important. If you see yellowing between leaf veins, your plant is hungry for magnesium. I dissolve one tablespoon of Epsom salt in a gallon of spray (for foliar application) and it works wonders.If you see any twisting of new growth, it has limited boron. You can achieve boron deficiency by simply pinching borax into a gallon of spray. I love these small alterations, they turned a client's spindly plants into market-quality celery.
pH Adjustment
- Testing: Use digital meter or test kit ($15-$30)
- Acidifying: Add peat moss at 1 lb/4 sq ft (0.45kg/0.37m²) for alkaline soils
- Neutralizing: Mix dolomite lime at 5 lbs/100 sq ft (2.27kg/9.3m²) for acidic soils
Organic Matter Integration
- Timing: Work compost into top 12 inches (30 cm) 30 days pre-planting
- Aeration: Mix 1 part perlite to 3 parts soil for heavy clay
- Bioactivity: Add 1 qt (946ml) compost tea per plant weekly
Nutrient Balancing
- Nitrogen: Apply blood meal at 0.25 cups/plant (60ml) for leaf growth
- Calcium: Add gypsum at 1 lb/10 sq ft (0.45kg/0.9m²) to prevent disorders
- Magnesium: Sprinkle Epsom salt at 1 tbsp/gal (15ml/3.8L) water monthly
pH Adjustment
- Testing: Use digital meter or test kit ($15-$30)
- Acidifying: Add peat moss at 1 lb/4 sq ft (0.45kg/0.37m²) for alkaline soils
- Neutralizing: Mix dolomite lime at 5 lbs/100 sq ft (2.27kg/9.3m²) for acidic soils
Organic Matter Integration
- Timing: Work compost into top 12 inches (30 cm) 30 days pre-planting
- Aeration: Mix 1 part perlite to 3 parts soil for heavy clay
- Bioactivity: Add 1 qt (946ml) compost tea per plant weekly
Macronutrient Balancing
- Nitrogen: Apply blood meal at 0.25 cups/plant (60ml) for leaf growth
- Phosphorus: Use bone meal at 0.3 cups/plant (70ml) for root development
- Potassium: Add wood ash at 0.5 cups/plant (120ml) for disease resistance
Fertilizer Timing
- Pre-Planting: Broadcast granular 5-10-5 fertilizer at 3 lbs/100 sq ft (1.36kg/9.3m²)
- Mid-Season: Side-dress with 1-2 inches (2.5-5 cm) compost every 4 weeks
- Flush Period: Stop fertilizing 3 weeks before harvest to reduce nitrates
Micronutrient Management
- Boron: Spray 1 tsp/5 gal (5ml/19L) boric acid solution monthly
- Magnesium: Apply Epsom salt at 1 tbsp/gal (15ml/3.8L) water biweekly
- Calcium: Foliar spray 1 oz/2 gal (30ml/7.6L) calcium nitrate weekly
Watering and Pest Control
Drip irrigation beats sprinkler irrigation for celery with its shallow rooting habits. I now use drip lines, formerly resorting to sprinklers which lost a crop to leaf fungi. I generally would target a gallon a day per plant delivered through emitters, because it allows the soil top crust to dry while keeping the foliage dry. I've found that overhead applications waste at least 40% more water, based on my trials.
Identify aphid thresholds as a 10-insect per leaf condition. I spray neem oil in clusters on the underside at 2 tbsp per gallon. For chronic problems, ladybugs are faster - 1,500 per 100 sq ft - and released shortly before dark. Sticky traps can monitor flying pest activity.
Growing nasturtiums at a distance of 18 inches from your celery plants will discourage striped cucumber beetles. My companion plant beds have 73% fewer pests than monoculture beds. You can also plant garlic at a distance of 3 feet, as garlic roots secrete antifungal compounds. Be sure to avoid dill, since it attracts the more harmful swallowtail butterflies.
Celery that is given too much water emits yellowing from the bottom upward. Celery that doesn't get enough water will show crispiness at the edges of leaves and pithy stalks. I test moisture levels deep in the soil by using a chopstick that I plunge between 4 and 6 inches deep into the soil and the dirt should cling to the chopstick a little bit. Root zones extend about 18 inches in width and about 8 inches in depth.
It is important to remember that mature celery requires a 18-inch root zone. Each month, I trenched all of my plants, slicing and loosening the compacted soil to introduce air. I used straw as mulch since it does a great job of retaining moisture without water-logging the soil. Lastly, I watered heavily, about two times a week, to allow the roots to reach for nutrients beyond the one-inch surface layer.
Drip Irrigation Setup
- Flow Rate: 1 gallon (3.8L) per hour per emitter
- Spacing: Place emitters 12 inches (30 cm) apart
- Timing: Run 45 minutes every 3 days in 80°F (27°C) weather
- Root Depth: Target 12-inch (30 cm) soil penetration
Soil Moisture Monitoring
- Finger Test: Insert 2 inches (5 cm) - dry = water
- Tensiometer: Ideal range 10-20 centibars
- Leaf Check: Limp outer stalks = dehydration
Mulching Practices
- Material: 3-inch (7.5 cm) straw layer
- Renewal: Replace every 8 weeks
- Buffer Zone: Keep 2 inches (5 cm) from stems
Drought Response
- Priority: Water root zone 12 inches (30 cm) deep
- Frequency: Every 5-7 days in 90°F+ (32°C+) weather
- Recovery: Apply seaweed extract after stress
Pest Prevention Timing
- Pre-Season: Apply neem oil spray 2 weeks before planting
- Monthly Checks: Inspect undersides of leaves every 30 days
- Companion Planting: Sow marigolds 6 weeks before transplant
Harvesting and Regrowing Techniques
To perfect the twist-cut technique grasp the exterior stalks firmly at the base and twist them forward clockwise until you have a crisp break. This method will leave the core transplant intact for future growth. My first attempt broke part of the root system, but once I mastered the method, my next two attempts both yielded double the number of Baobob shoots.
Water propagation forms roots quickly (5 days), but generally not long-term. In my trials, when transplanted to soil, they lived three times longer. For best results, after about 1 inch of roots has formed, transplant the water-propagated cuttings to pots. To ease transplant shock, I added mycorrhizal powder.
Remove stalks when the vertical ribs are dark green and are between 12-15 inches long. Immature celery typically does not have a sweet flavor; the leaf tips should darken slightly. I will always taste-test the product daily near the windows of maturity. Stalks that become overgrown will start developing stringy fibers, even if the stalk looks perfect.
Container regrowing can be carried out in pots that are 10 inches or larger and which have at least 2 drainage holes on the bottom. Use a lightweight soil mix of 3 parts coconut coir and 1 part worm castings for soil. I have successfully produced about 8 bunches in my apartment garden every year with this soil mix. Place the pots on bricks to prevent water from gathering and becoming soggy.
Twist-Cut Method
- Target Stalks: Outer mature stalks 12-15 inches (30-38 cm) tall
- Technique: Twist clockwise until snap heard at base
- Frequency: Harvest 2-3 stalks weekly per plant
Continuous Harvesting
- Season Extension: Use row covers for 4-week longer harvest
- Yield Boost: Remove flowers to redirect energy to stalks
- Tool Care: Sterilize shears with 70% alcohol between plants
Container Regrowing
- Pot Size: Minimum 10-inch (25 cm) diameter
- Soil Mix: 3:1 compost-perlite ratio
- Light Needs: 6h direct sunlight or 14h artificial light
Cold Storage Prep
- Pre-Chilling: Soak stalks in ice water 30 minutes pre-storage
- Packaging: Wrap in damp paper towels inside perforated bags
- Shelf Life: 3 weeks at 32°F (0°C) with 95% humidity
Seed Production
- Biennial Cycle: Overwinter plants for 2nd-year seeds
- Isolation Distance: 800 feet (244 m) from other varieties
- Yield: 1 oz (28g) seeds per mature plant
5 Common Myths
Celery grows crunchier stalks through consistent inundation.
Celery must have a dependable supply of water, waterlogged soil ultimately will cause root rot. For celery growth, you can maintain water levels at 1-1.5 inches (2.5-3.8 cm) weekly using a drip irrigation system. The crunch comes from cell wall integrity, not going to excess watering.
All types of celery require blanching to lessen the bitter taste.
Self-blanching varieties such as Tango develop sweet stalks by nature. Traditional types of celery require the soil to be mounded around the stems 2-3 weeks before harvest. Heat stress will primarily contribute to bitterness, rather than lack of blanching.
Celery cannot effectively grow in containers.
Compact varieties - such as Conquistador - successfully grown in 10 inches (25 cm) pot, when proper fertilization is used. By using a potting mix which retains moisture and watering twice a day, when weather is above 80°F (27C) you will be able produce ripe celery.
Homegrown celery seeds won't be viable for replanting.
Seeds are viable for 5 years if they are kept in airtight containers with silica gel. The germination rate according to research dropped from 85% to 55% after 3 years, but seeds are still usable as long as they get proper stratification.
Celery crops will die following the first harvest.
By twist-cutting the outer stalks (think about harvest) the celery plants will develop new growth. When well established, celery plants can produce for 2-3 seasons in USDA zones 8-11. If celery is grown in a colder climate place the stalks and mulch the roots with a 6 inches (15 cm) depth of straw to overwinter the roots.
Conclusion
Celery's versatility comes to the forefront, whether your gardens are in the backyard or balcony containers. I have been successful in harvesting firm stalks from both Persephone clay soil in the Midwest and humid gardens down south by altering one or another soil amendment or tending technique. My niece has had some success, as well, on her shaded fire escape over in Brooklyn, NY, with a bit of reflective mulch and toiling dwarf varieties.
The 100-day growth cycle demands patience but allows for diligence. Mark your calendar when you are seeding! I set biweekly reminders to assess growth. Those first 60 days of absolutely no growth were incredibly frustrating until I learned to acknowledge the victory of a stalk that had thickened by, at most, millimeters.
Create ideal stalks by process of appropriate blanching. About 21 days before harvest, wrap the stems in brown craft paper - this stress softens the flavor and enables a sweet stalk. I conduct weekly inspections of the leaves to avert destruction from aphids, which completely recall the stalk. I maintain a routine of watering one inch/week to avoid a hollow stem, which can be disappointing at harvest.
Record everything you can think of for every variable - I track leaf spread at intervals (monthly) in a grid notebook. I take photos of root development, looking through clear nursery pots. The habit of recording eventually exposed some early mistakes in over-fertilization. As long as you continuously track patterns, your third growing season will be an improvement over your first.
External Sources
Frequently Asked Questions
What is the best way to grow celery?
Grow celery in nutrient-rich soil with consistent moisture. Start seeds indoors 10-12 weeks before frost, use heat mats for germination, and transplant after hardening off. Space plants 6-8 inches apart in partial shade for optimal stalk development.
Why is celery difficult to grow?
Celery requires precise conditions: steady moisture, fertile soil, and cool temperatures. It's sensitive to drought, heat, and pests like aphids. Beginners often struggle with germination timing and preventing stringy, bitter stalks without proper blanching or fertilization.
Does celery grow back after cutting?
Yes, celery regrows if you harvest outer stalks carefully. Leave the central heart intact, and new stalks will emerge. For full regrowth, replant the base in soil after rooting it in water for 7-10 days.
How long does celery take to grow?
Celery needs 120-140 days from seed to harvest. Transplants take 90-110 days after moving outdoors. Slow germination (14-21 days) and cool growing seasons contribute to its long maturation period compared to other vegetables.
Does celery prefer sun or shade?
Celery thrives in morning sun and afternoon shade. In hot climates, provide 4-6 hours of filtered light. Full sun causes wilting, while too much shade leads to thin, weak stalks. Use shade cloth above 80°F.
What should not be planted near celery?
Avoid planting these crops nearby:
- Corn (competes for nutrients)
- Parsnips (shared pest risks)
- Potatoes (stunts growth)
- Carrots (attracts carrot flies)
Can you regrow store-bought celery?
Yes, place the 2-inch base in shallow water until roots form, then transplant to soil. However, store-bought celery often has reduced regrowth potential compared to homegrown starts due to commercial breeding and storage treatments.
What is the best celery fertilizer?
Use balanced organic fertilizers:
- Compost tea every 2 weeks
- Fish emulsion (5-1-1) during growth spurts
- Seaweed extract for micronutrients
- Bone meal for phosphorus at planting
Do coffee grounds help celery grow?
Coffee grounds add nitrogen but must be composted first. Mix sparingly into soil to avoid acidity spikes. Pair with crushed eggshells to balance pH and provide calcium for preventing black stem rot.
Can celery survive winter frost?
Mature celery tolerates light frosts (28-32°F) with row covers. Prolonged freezing temperatures kill plants. In zones 8+, overwinter by mulching heavily. For colder zones, grow as an annual or move pots indoors before first frost.