
Learning to understand how to grow cauliflower involves knowing that it is a bit picky. As a cool-weather crop, it requires consistent management, especially when growing conditions are variable. If your garden experiences warm afternoons and cool nights, expect to see small heads or premature bolting. This is where patience becomes more important than you think.
Begin with your soil pH at a target of between 6.5 and 7.2 to reduce clubroot, a fungal disease that infects roots. I learned the hard way when my crop was lost to stems that were twisted and swelled. Make sure to test your soil every year. If your soil is too acidic, you need to add some lime. If your soil is too alkaline, you need to add some sulfur.
If you are inexperienced, consider using quick-growing types like Early White Hybrid. These reach maturity in 45 days and sail past the summer heat that causes bitterness. I recommend them for short seasons. Their smaller size works well in small gardens and they are more forgiving to transplanting than other varieties.
Concentrate on the fundamentals first. Avoid terms like ‘curd development stages' that sound advanced - it is more important to first focus on consistent watering and consistent fertilizer application. Adding complexity just creates confusion. Believe it or not, my first success came from being simple - consistent care will beat the pursuit of perfection every day of the week.
Essential Care: Watering, Feeding, and Pest Control
It is vital to water cauliflower consistently. You're aiming for 1-1.5 inches per week, and you should measure that with a rain gauge. One summer, I did not do this and lost half of my crop to split heads. Sandy soils may require checking more often, so you can dig down four inches to check moisture.
The onset of boron deficiency happens quickly. Yellowing leaves, along with hollow stems, indicate a problem. I remain true with kelp emulsion, every other week at two tablespoons per gallon. Last summer, it kept the spirals of my Romanesco tight and vivid. Monitoring soil tests monthly keeps surprises at bay!
Aphids have a fondness for the tender leaves of cauliflower. A simple solution is to use dish soap mixed with 1 part to 2 parts water and spray at dawn. This is a ratio that I have found to spare many beneficial insects while also suffocating pests. You may want to reapply after it rains, as these tiny bugs recover quickly.
Drip irrigation always comes out on top in comparison to overhead watering. Fungal diseases are attracted to wet leaves. After I transferred to using drip irrigation lines, my plants ceased wilting for no apparent reason. Watering overhead is time and water inefficient while also promoting mildew growth, if you intend your plants to be more healthy and produce more for you, stick to watering the soil directly!
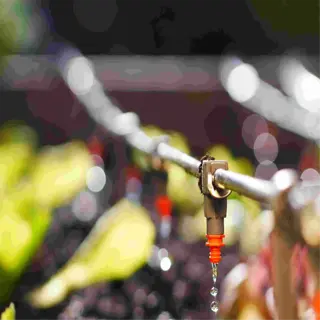
Drip Irrigation Kit
- Delivers water directly to roots, reducing leaf moisture and fungal risks
- Ideal for maintaining 1-1.5 inches (2.5-3.8 cm) weekly in sandy soils
- Pair with timer for automated morning watering sessions
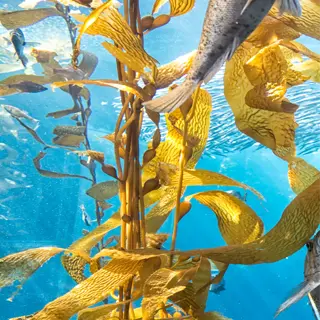
Kelp Emulsion
- Provides boron and trace minerals to prevent browning curds
- Mix 2 tablespoons per gallon (15 ml per 3.8 liters) every 2 weeks
- Safe for organic gardening and beneficial insects

Soil Moisture Meter
- Measures moisture at root level to prevent over/underwatering
- Analog models avoid battery dependency in humid conditions
- Calibrate for clay vs. sandy soil types

Row Covers
- Protect seedlings from flea beetles and cabbage moths
- Use 0.5 mm thickness for pest exclusion while allowing light penetration
- Secure edges with soil or sandbags to prevent wind damage

Bt Spray Bottle
- Pre-mixed Bacillus thuringiensis solution targets caterpillars without harming bees
- Apply at dawn for maximum absorption
- Effective against cabbage loopers within 48 hours
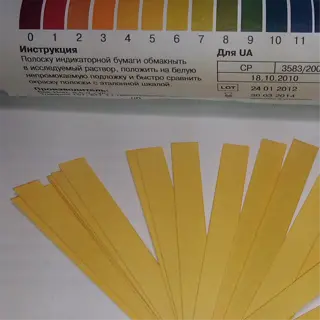
pH Test Strips
- Monitor soil acidity weekly to maintain 6.5-7.2 range
- Color-coded results simplify clubroot prevention
- Calibrate with vinegar/baking soda for accuracy checks

Gardening Gloves
- Prevent soil-borne disease transfer during pest inspections
- Nitrile-coated palms improve grip on tools and seedlings
- Machine-washable designs extend usability
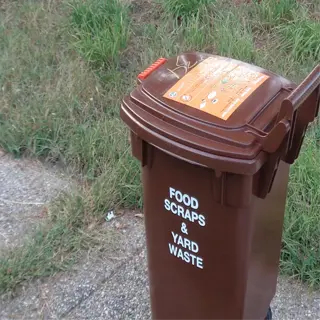
Compost Bin
- Produces nutrient-rich compost for mid-season fertilization
- Maintain 3:1 brown-to-green ratio for optimal decomposition
- Turn pile weekly to accelerate breakdown
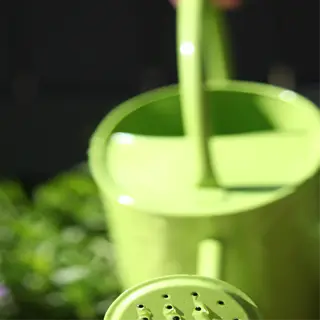
Watering Can
- Precise root-zone watering avoids wetting leaves
- 2-gallon (7.6-liter) capacity reduces refill frequency
- Removable rose attachment for gentle seedling irrigation
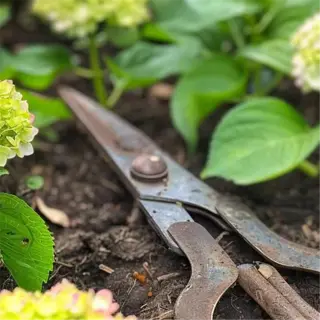
Pruning Shears
- Sterilize blades with alcohol to prevent disease spread
- Remove yellowing leaves to improve airflow
- Bypass design ensures clean cuts on thick stems
Choosing the Right Variety for Your Climate
When it comes to picking the best cauliflower variety, your climate is the first thing to consider. If you have a short growing season or you're in an area that has frosts, the Snow Crown is the best choice. I have seen it push through very light frosts without damage and produce solid heads in 55 days. It is the best survivor and is a perfect beginner's variety to grow.
Consider self-blanching types such as Denali where you don't have to constantly check leaves curling to block sunlight. Last summer, I didn't check my plant every day and I still had beautiful, snow-white curds. This is a consideration in a busy garden where the less I have to tend the easier it is to not forget or mess things up. These self-blanching traits are indeed useful for people growing crops while also working or processing through kids/summer activities.
If you're looking to impress by adding some variety, consider using the Purple Moon or Cheddar types. They not only add vibrant colors to your plates, but they are also rich in antioxidants like beta-carotene. My neighbor's purple heads received compliments all season long! One caveat is that the colored types must be grown in full sun so you get those deep, beautiful colors. Do not blanch the colored types either, as it diminishes their brilliance.
Damp climates require disease-resistant options. Amazing indeed lives up to its billing, shrugging off the mildew that wiped out my first crop. Its compact florets resist rotting even during periods of rain. Just make sure to water it in the morning to keep the leaves dry and avoid pathogens!
Snow Crown
- Plant ¼ inch (0.6 cm) deep in rows 30 inches (76 cm) apart
- Withstands light frosts down to 28°F (-2°C)
- Harvest heads at 6-7 inches (15-18 cm) wide
Amazing
- Space transplants 24 inches (61 cm) apart for airflow
- Resists black rot and clubroot
- Prefers consistent moisture; water 1.5 inches (3.8 cm)/week
Purple Moon
- Thrives in zones 7-10 with afternoon shade
- No blanching required; full sun enhances color
- Apply kelp emulsion for boron every 14 days
Early White Hybrid
- Ideal for container gardening (18-inch/45 cm pots)
- Direct-sow seeds 12 weeks before first frost
- Use row covers to protect from flea beetles
Romanesco
- Plant in full sun; requires 8+ hours daily
- Heads reach 8-10 inches (20-25 cm) at maturity
- Susceptible to aphids; spray soapy water weekly
Soil Preparation and Planting Basics
Begin discussing soil pH testing, and try to get your soil pH up to 6.5-7.2 to prevent clubroot. I have not been diligent about this, and I lost an entire crop due to twisted roots. You can buy a test kit for about $10. If the pH is too acidic, you can add lime. If too basic, use sulfur. I re-test every 3 weeks until the pH is in the acceptable range.
Combine 2 parts compost to 1 part aged manure to upgrade your soil into a nutrient powerhouse! Fresh manure has burned many roots; I learned that lesson when it stunted my seedlings. Mix, and work it into the soil to a depth of 8 inches. On sandy soils? Add peat moss to hold moisture around the shallow roots.
Plant seeds ¼ inch deep and make transplants a little deeper. Bury stems until they are at their first true leaves - this helps stabilize tall leggy seedlings. My first set of seedlings went very poorly until I put stems in the soil. Space plants 18 inches apart so the plants can have airflow to help mitigate mildew.
Plan your plantings around frost dates. You will plant your spring crops anywhere from 2 to 4 weeks before the last frost and your fall crops will go in 6 - 8 weeks before your first frost. I have noted the fall crops produced denser heads. Use row covers early and use shade cloth later for temperature shocks.
Soil Testing
- Collect samples from 5-6 spots in the garden at 6-inch (15 cm) depth
- Adjust pH using lime (to raise) or sulfur (to lower) per test results
- Retest soil after 4-6 weeks to confirm adjustments
Compost Integration
- Use 2 parts compost to 1 part manure for balanced fertility
- Avoid fresh manure: can burn roots and introduce weeds
- Work mixture into soil 2 weeks before planting
Drainage Solutions
- For clay soils: add 20% perlite by volume
- For sandy soils: mix 3 inches (7.6 cm) of peat moss to retain moisture
- Create raised beds if water pools for >1 hour after rain
Planting Depth
- Seeds: ¼ inch (0.6 cm) deep in rows 30 inches (76 cm) apart
- Transplants: Bury stems up to first true leaves
- Water immediately with 1 quart (0.9 liters) per plant
Crop Rotation
- Avoid planting brassicas in the same spot for 3-4 years
- Follow brassicas with legumes (beans/peas) to restore nitrogen
- Mark planting zones on a garden map for reference
Blanching and Harvesting Simplified
Begin blanching cauliflower heads when they have reached about 2-3 inches (5-7.6 cm) wide, or about the size of a tennis ball. I once waited too long, and the curds turned yellow from sunlight. Use soft twine or rubber bands to loosely tie the outer leaves. Check daily to see how snug they are expanding.
Self-blanching types like Denali make it simple. Their leaves curl over the heads naturally - unlike colored types. Purple Moon or Cheddar cauliflower, for example, need/like full sun for pigment development, but blanching will hinder that. Only save manual tying for the traditional, classic white varieties.
Be on the lookout for *yellowing leaves or moisture that has become trapped under the covers*. Last summer I had one week between checking the lettuce plants and I found slimy rot instead. Every 3 days, simply lift the leaves briefly to allow airflow under the covers. On the off chance the buds on a leaf do begin to separate, it's time to harvest - they will not tighten back up.
You may harvest the plant when the heads feel dense and the buds feel tight to the head and display a firm texture. If you gently press and it feels springy, the curd is immature. Harvest by using a sharp knife and cutting stems two inches below the head. My best harvests have occurred at dawn, due to cool temperatures preserving shelf life and crispness.
Selecting Leaves for Blanching
- Choose 4-6 large, healthy outer leaves
- Avoid leaves with pest damage or yellowing
- Ensure leaves fully cover the head without cracking
Tying Techniques
- Use soft rubber bands to avoid stem damage
- Wrap twine loosely for airflow around the head
- Re-adjust ties weekly as the head expands
Monitoring Head Development
- Check daily for bud separation (indicates over-maturity)
- Measure head width with a ruler; harvest at 6-8 inches (15-20 cm)
- Test firmness: Heads should feel dense, not spongy
Harvesting in Hot Weather
- Cut heads in early morning to preserve crispness
- Soak heads in ice water for 10 minutes before refrigerating
- Avoid sun exposure post-harvest to prevent wilting
Storing Cauliflower
- Wrap heads in damp paper towels inside perforated plastic bags
- Store in refrigerator crisper drawer at 90-95% humidity
- Use within 2 weeks for best flavor and texture
Troubleshooting Common Growth Issues
*Buttoning*, or the formation of small heads early, is often attributed to wide temperature fluctuations or rough transplanting. I lost a crop after I pulled my seedlings too early or during a cold snap. To mitigate buttoning, simply maintain soil temperature consistently above 50°F (10°C) and ensure that you harden off your plants gradually to avoid transplant shock.
Brown crumbly curds indicate deficiency in boron, test soil before planting, a level 0.5 ppm or less is bad. Last season, my heads of Snow Crown browned, but I supplemented my regimen with borax (1 tsp/gallon water). Kelp emulsion can also be used as a preventive every 14 days and does not burn with chemicals.
Aphids congregate on the undersides of leaves, leaving a sticky mess behind. Cabbage worms munch cleaved holes in between the leaf veins. I do a spot check at dawn. I have heard that a mixture of soapy water (one part soap combined with two parts water) suffocates aphids. With worms, it is better to use bacteria called *Bt spray*, which is not harmful to the ladybugs that patrol nearby.
Yellowing lower leaves are a glaring indicator of nitrogen deficiency. A nitrogen-deficient plant does not yellow from over-watering (even if it is yellowing), it will pale from the bottom up. I will side-dress with blood meal about mid-season. Compost tea applied every 10 days will green them up quickly - just do not use higher phosphorus fertilizers because that can contribute to an imbalance.
Fixing Buttoning
- Transplant seedlings after 4-5 true leaves form
- Avoid exposing plants to <50°F (10°C) for >5 days
- Mulch with straw to stabilize soil temperature
Correcting Boron Deficiency
- Test soil boron levels before planting
- Apply 1 tsp borax dissolved in 1 gallon (3.8 liters) water per plant
- Repeat every 3 weeks until heads form
Eliminating Cabbage Worms
- Handpick green caterpillars daily
- Apply Bt spray to leaf undersides every 7 days
- Encourage ladybugs with companion plants like dill
Balancing Nitrogen Levels
- Use fish emulsion (2 tbsp/gallon) weekly
- Avoid high-phosphorus fertilizers
- Rotate with legumes to restore soil nitrogen
Managing Heat Stress
- Water deeply at soil level in early morning
- Install shade cloth from 10 AM-4 PM during heatwaves
- Mist leaves lightly if temps exceed 85°F (29°C)
5 Common Myths
Cauliflower needs sun for the entirety of the day to form heads.
While cauliflower does need 6-8 hours of sunlight, afternoon shade will help prevent heat stress in zones 7-10. Partial shade (4-6 hours) allows the soil to hold more moisture and maintains head density at above 75 degrees Fahrenheit (24C).
Every variety will need manual blanching to remain white.
Self- blanching varieties like Snow Crown and Denali will curl their leaves over the heads naturally. Colored types (purple and orange) require full sun to develop the pigments; thus, these should never be blanched.
Cauliflower is not capable of growing in containers or in small spaces.
However, dwarf varieties like the Early White Hybrid can thrive in an 18-inch (45 cm) container. Combine 80% potting mix + 20% compost in the pot and water to 1.5 inches (3.8 cm) per week to enable compact 6-inch (15 cm) heads Source: J. Scott, Dave Williamson (2022).
Yellowing leaves indicate some water issue, most likely too much water or, less probably, a disease issue.
Lower leaf yellowing typically means nitrogen deficiency. Add blood meal (1 cup/10 sq. ft) or fish emulsion (2 tbsp/gallon). Only consider a disease issue if the yellowing starts at the crown but, there are also black spots.
Cauliflower heads must be harvested at exactly 60 days.
Days to maturity vary by variety: Snow Crown (50-55 days), Romanesco (85 days). Harvest when heads reach 6-8 inches (15-20 cm) wide, regardless of timeline, to avoid bud separation.
Conclusion
By understanding preparation of soil, choice of variety, and pest management you can change cauliflower from a temperamental vegetable to a productive one. It starts with good soil and strong transplants with a pH balance. Combine this with proper vegetable management and you will be rewarded with heads that are crisper and healthier than the store can provide.
Don't be afraid to try those bold Romanesco or purple varieties. Their geometric spirals or jewel tones will bring a new level to your meals and landscaping efforts. I grew Orange Cheddar last fall, and I was pleased when guests who had never tried it said they were surprised by its sweetness. These varieties will act like classic white types, grown with the same care,but they will always steal the show.
When things go sideways, run with expediency. Buttoning? Expose plants to the outdoors with row covers post-cold snap. Yellowing leaves? Apply a blood meal to green it up in a few days. Use the kelp emulsion as needed for boron enigmas. Responding quickly is sometimes more practical than getting it perfect, and gets crops saved more than anything else.
Snip that first head with pride. Whether it's the size of a marble or the size of a dinner plate, enjoy the victory. You could roast it whole, share it fresh, or pickle the florets. Each harvest validates that waiting pays off, and you coaxed beauty out of difficulty. Now, turn your mind to next season's encore.
External Sources
Frequently Asked Questions
Why is cauliflower difficult to grow?
Cauliflower is sensitive to temperature swings, pests like cabbage worms, and nutrient imbalances. It requires consistent soil moisture, precise pH levels (6.5-7.2), and protection from heat or frost to form dense heads.
How long does it take cauliflower to grow?
Most varieties mature in 50-85 days, depending on type and climate. Quick-growing hybrids like Early White Hybrid take 45 days, while Romanesco needs 85+ days. Cool temperatures (50-70°F) speed growth; heat delays head formation.
How many heads of cauliflower does one plant produce?
Each plant produces a single head. Stressors like drought or heat can cause ‘buttoning,' where tiny, unusable heads form. Proper spacing, watering, and fertilizing ensure one full-sized head per plant.
What should you avoid planting near cauliflower?
Avoid planting broccoli, kale, or strawberries nearby. These attract similar pests (e.g., cabbage worms) or compete for nutrients. Instead, pair with pest-repellent plants like celery or onions for healthier growth.
What is the secret to growing large cauliflower heads?
Prioritize three factors:
- Soil prep: Amend with compost and maintain pH 6.5-7.2
- Blanching: Cover white varieties at 2-3 inches wide
- Watering: Provide 1-1.5 inches weekly to prevent stress
Is synthetic fertilizer safe for cauliflower?
Synthetic fertilizers like Miracle-Gro can be used but risk nitrogen burn. Organic options like compost or fish emulsion provide steadier nutrients. Always follow soil test recommendations to avoid over-fertilizing.
When is the best time to plant cauliflower?
Plant in early spring (2-4 weeks before last frost) or late summer (6-8 weeks before first frost). Fall crops often yield better heads due to cooler, stable temperatures.
Can you regrow cauliflower after harvesting?
No, cauliflower doesn't regrow after harvest. Unlike broccoli, it produces only one head. Remove the plant after harvesting to reuse space for rotational crops like beans.
What plants compete poorly with cauliflower?
Avoid planting cauliflower near:
- Other brassicas (broccoli, kale): Share pests/diseases
- Tomatoes: Heavy feeders that deplete soil nitrogen
- Pole beans: Vine growth blocks sunlight
Does cauliflower need full sun?
Cauliflower thrives in 6-8 hours of sunlight but benefits from afternoon shade in hot climates. Partial shade prevents heat stress and helps retain moisture for denser heads.