
Knowing how to grow Brussels sprouts allows you to harvest crisp, sweet, and crunchy Brussels sprouts that have far better flavor than vegetables from the grocery store. They thrive in cold conditions when other plants are usually shrinking and wilting. I've seen my Brussels sprouts pop through the snow in November, with flavor improving every time they are coated in frost and neglected. They are persistent!
Home-grown sprouts contain three times the amount of vitamin C as the store types. For many first-time growers, this is a surprise. My neighbor once said that hers are like 'candy-coated cabbages' and that sugary sweetness only happens after the plants survive,- surviving near-freezing temperatures in your yard.
Frosts are not only permitted; they are positively welcomed. Sprouts that endure through the early cold snaps produce flavors of a complexity that cannot be achieved on commercial farms. If you need visual proof, take a picture of your jewel-like sprouts glazed with ice crystals, and you will document that beauty occurs in winter gardens.
Soil is more important than your gardening proficiency. Brussels requires boron-rich soil, and I keep mine vitamized with a constant supply of crushed eggshells. Go ahead and check the pH of your soil once a month. If you keep in mind their odd demands, these fibrous stalks will surprise you by producing pounds of nugget-sized gems.
Planting Timing and Techniques
Direct sowing is inferior to indoor seed starting for brussels sprouts. Start your seeds 6 weeks before your last frost date. Seed germination rates went from 60% to 95% for me using heat mats. If you live in the southern parts of the United States, okay heed this: wait until late summer so it doesn't bolt; direct sow in July.
Zones determine your calendar. For those of you in Zones 3-5, you can move your hardened seedlings out to the garden by mid-June; and for those in Coastal Zone 8, your transplants need to go into the ground by Labor Day. The way I keep track as to when to take action in my almanac is two dates: once is the week to prep soil, and the second is the absolute date to plant.
Give these giants room. Allow 24-30 inches between plants because crowded plants promote mildew. I utilize a zigzag pattern in my raised beds to help with airflow! In a traditional row garden, I still leave 30-inch aisles so I have access to harvest. I learned the hard way that first year with a jungle of tangled stalks.
Retail-grown seedlings require a strong hand. Plan for a 7-day acclimation period. I put mine under 50% shade cloth for daylight, then full sun the rest of the day. I water with kelp tea to reduce transplant shock. If you see a curl in leaves, that means the seedlings are ready for serious dirt.
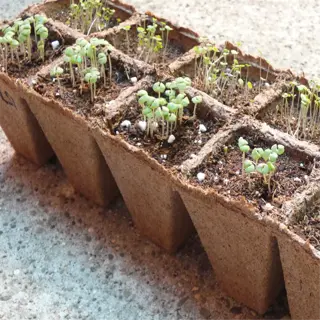
Seed Starting Trays
- Depth: Requires 4 inch (10 cm) cells for root development
- Material: Biodegradable pots reduce transplant shock risk
- Drainage: Must have 5+ holes per cell
- Sterilization: Soak in vinegar solution before reuse
- Heat Mats: Maintain 68°F (20°C) for germination
- Cover: Use humidity domes until first leaves emerge

Spacing Tools
- Row Markers: 30 inch (76 cm) between rows
- Plant Stakes: 18-24 inch (45-60 cm) spacing
- Trellis: Needed for varieties over 36 inch (91 cm)
- Tape Measure: Verify diagonal bed spacing
- Template: Create cardboard spacing guide
- Path Width: Maintain 12 inch (30 cm) access

Soil Thermometer
- Ideal Range: 50-70°F (10-21°C) for germination
- Depth: Measure at 2 inch (5 cm) depth
- Timing: Check morning and afternoon temperatures
- Calibration: Verify accuracy in ice water mixture
- Storage: Keep in dry case between uses
- Night Check: Ensure temps stay above 45°F (7°C)
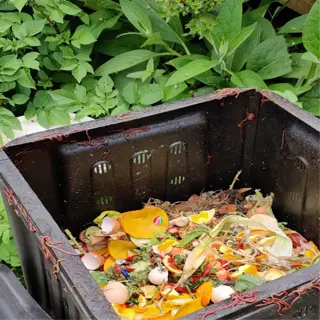
Compost Bin
- Mix Ratio: 2:1 brown to green materials
- Turn Frequency: Every 3-4 days in summer
- Temperature: 130-150°F (54-65°C) kills pathogens
- Moisture: Should feel like wrung-out sponge
- Application: 3 inch (7.6 cm) layer pre-planting
- Curing: Age compost 4 weeks before use
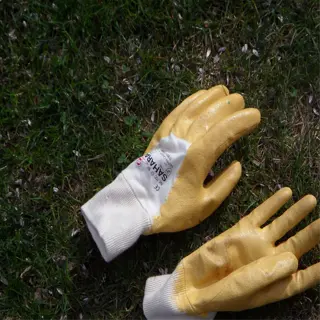
Gardening Gloves
- Material: Nitrile-coated for grip and protection
- Sizing: Measure hand circumference at knuckles
- Cleaning: Machine wash at 140°F (60°C)
- Drying: Air dry away from direct sunlight
- Replacement: Change every 20-30 uses
- Storage: Hang vertically to maintain shape
Bed Preparation
- Timing: Prepare beds 2 weeks before transplanting
- Depth: Turn soil 12 inches (30 cm) deep
- Amendments: Mix 3 inch (7.6 cm) compost layer
- pH Adjustment: Add lime if below 6.2
- Drainage: Incorporate perlite in clay soils
- Leveling: Use grading rake for even surface
Transplanting
- Depth: Match original soil line on stem
- Water: Soak rootball 30 mins pre-planting
- Time: Plant after 4PM to reduce shock
- Support: Insert stake before root growth
- Mulch: Apply 2 inch (5 cm) straw layer
- Protection: Use cloches for first 48hrs
Soil Testing
- Frequency: Test 6 months before planting
- Depth: Collect samples at 6 inch (15 cm)
- Locations: 5+ spots per 100 sq ft
- Nutrients: Focus on N-P-K and boron levels
- Reporting: Use local extension lab services
- Retest: 2 weeks after amendments applied
Amendment Application
- Timing: 4 weeks before planting
- Boron: 1 tbsp borax/5 qt water per 50 sq ft
- Nitrogen: Blood meal at 1 cup/10 sq ft
- Phosphorus: Bone meal for root development
- Potassium: Wood ash for disease resistance
- Mixing: Rototill to 8 inch (20 cm) depth
Pre-Watering
- Timing: 24 hours before transplanting
- Depth: Moisture to 8 inch (20 cm) depth
- Temperature: Use 60-70°F (16-21°C) water
- Additive: Seaweed extract for root boost
- Drainage: Confirm no standing water
- Mulch: Apply immediately after watering
Ideal Soil and Fertilizer Setup
Clay soils require earthy amendments like coarse sand and compost. I improved my sticky plot in the Midwest with 4 inches of decomposed leaves. Sandy soils? Mix in peat moss into the top 12 inches. All clay and sandy soils need boron that they may be missing out on if you overlook this element.
Identify boron deficiency if stems hollow out or if leaves cup upward. In my first crop, mine were rubbery sprouts until I dissolved 1 tbsp borax in 5 gallons of water. If your soil test indicates boron levels below 0.5 ppm, apply this solution once per month.
Once sprouts have reached the size of a marble, it's time to brew a compost tea. I take worm castings and steep them in water for 48 hours and then drench the soil early in the morning. The microbes help push the plants through their awkward teen phase. I only treat them with compost tea in the morning when the dew is present to help improve root uptake.
Treat your plants like a play. The early growth stage will require 5-10-10 NPK fertilizer to establish roots. After they grow some buds, switch to a 3-15-15 fertilizer. Another tip I like is to add crushed oyster shells when planting. They are slow-releasing calcium and help balance the soil pH for about six months.

Borax
- Dilution: 1 tbsp per 5 quarts (4.7 L) water
- Coverage: Treats 50 sq ft (4.6 m²)
- Timing: Apply at first true leaf stage
- Frequency: Single annual application
- Mixing: Dissolve in warm water first
- Storage: Keep in airtight container
Seaweed Extract
- Concentration: 1 oz per gallon (30 ml/3.8 L)
- Schedule: Every 3 weeks during growth
- Method: Foliar spray or soil drench
- NPK: 0-0-1 with 0.02% boron
- Timing: Morning applications preferred
- Combo: Mix with fish emulsion
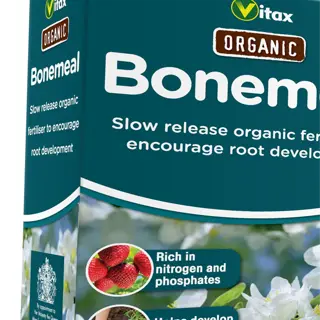
Bone Meal
- Rate: 5 lbs/100 sq ft (2.3 kg/9.3 m²)
- Timing: Pre-planting incorporation
- Depth: Work into top 6 inches (15 cm)
- Caution: Avoid over-application
- NPK: 3-15-0 with trace boron
- Storage: Pest-proof containers
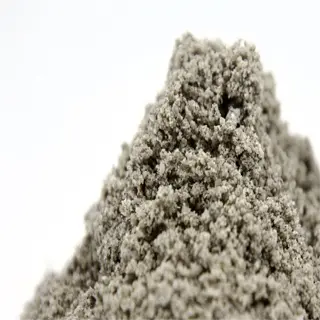
Granite Dust
- Rate: 10 lbs/100 sq ft (4.5 kg/9.3 m²)
- Release: Slow boron mineralization
- pH Impact: Neutral effect on soil
- Mixing: Blend with top 8 inches (20 cm)
- Frequency: Biannual application
- Source: Crushed granite quarries
Borated Fertilizer
- Ratio: 0.5% boron content
- Application: 1 cup/50 sq ft (236 ml/4.6 m²)
- Timing: Early growth stage
- Water-In: Requires post-application irrigation
- Brands: Look for USDA-approved formulas
- Safety: Keep away from children/pets
Material Ratio
- Browns: 2 parts dry leaves/straw
- Greens: 1 part kitchen scraps
- Layering: Alternate 4 inch (10 cm) layers
- Turning: Every 5-7 days
- Moisture: 40-60% humidity
- Temp: 130-150°F (54-65°C)
Application
- Timing: 4 weeks before planting
- Depth: 3 inches (7.6 cm) surface layer
- Mixing: Rototill to 8 inches (20 cm)
- Aging: Cure 2 weeks pre-use
- Rate: 1 cubic yard/100 sq ft (0.76 m³/9.3 m²)
- pH Check: Test after incorporation
Testing Maturity
- Germ Test: Sow radish seeds in sample
- Smell: Earthy aroma indicates readiness
- Texture: Crumbles freely when squeezed
- Temp: Below 100°F (38°C) when stable
- Color: Uniform dark brown/black
- Contaminants: Screen for plastics
Seasonal Timing
- Spring: Apply 6 weeks before last frost
- Fall: Incorporate after first harvest
- Summer: Light top-dressing only
- Winter: Use as mulch layer
- Rainy Season: Avoid waterlogged soils
- Drought: Increase watering frequency
Mixing Techniques
- Tarp Method: Turn piles on plastic sheeting
- Aeration: Use pitchfork every 3 days
- Moisture: Spray with hose during turning
- Shredding: Chop materials to 2 inch (5 cm)
- Layering: Carbon/nitrogen alternation
- Inoculants: Add finished compost starter
Pest Control and Prevention
Encourage the presence of natural predators by placing corridors of dill between the sprouts. I took my lacewing army, which scourges aphids, after putting in the yarrow patches. A single toad house, situated close to my crop rows, alone halved my slug damage. My allies do their work while I am asleep at night.
Diatomaceous earth does not work after it is wet. To be the most effective, apply a fairly thin coat of the powder onto dry leaves only after dawn, using a flour sifter. If your application is disturbed by a heavy rainstorm, be sure to reapply. I even have a special duster I keep in my gardening shed just to brush onto the leaves for our general weekly touch-ups.
Neem oil is organic, which can take 10 days to break cycles, while chemical sprays are immediate fixes that strip the protective wax off leaves. I have previously done small trial plots that demonstrated neem-treated plants produced 30% more, even with the damage, because they are far more patient, which protects your soil microbiome!
Flank them with nasturtium traps and garlic sentries! Consider marigolds, they repel the root-knot nematodes along flowerbeds at least 18 inches from the stalks! Last fall, my well-mulched thyme-edged bed remained relatively caterpillar free, while the others were decimated. Strategic partners beat sprays for the schedule in the off-season.

Neem Oil Spray
- Mixing: 2 tbsp per gallon (30 ml/3.8 L)
- Frequency: Every 7-10 days
- Timing: Evening applications
- Coverage: Undersides of leaves
- Safety: Harmless to beneficial insects
- Storage: 6-month shelf life

Diatomaceous Earth
- Application: Dry powder around stems
- Reapplication: After heavy rain
- Safety: Food-grade version required
- Effectiveness: Kills in 48 hours
- Limitation: Avoid flowering periods
- Storage: Airtight container
Companion Plants
- Repellents: Nasturtiums, mint, thyme
- Trap Crops: Radishes, mustard greens
- Spacing: 12-18 inches (30-45 cm)
- Timing: Plant 2 weeks before sprouts
- Maintenance: Regular pruning
- Rotation: Change annually

Sticky Traps
- Placement: 6 inches (15 cm) above plants
- Density: 1 trap per 10 sq ft (0.9 m²)
- Replacement: When 80% covered
- Targets: Whiteflies, aphids
- Limitation: Doesn't affect larvae
- Safety: Keep from bird contact

Row Covers
- Material: 0.6mm insect netting
- Installation: Secure edges with soil
- Venting: Lift for pollination
- Duration: First 6 weeks critical
- Cleaning: Mild soap solution
- Storage: Dry folded
Cultural Controls
- Crop Rotation: 3-year brassica cycle
- Sanitation: Remove plant debris
- Watering: Avoid overhead irrigation
- Timing: Morning watering
- Spacing: 24+ inch (60+ cm) airflow
- Soil Health: Balanced nutrients
Biological Controls
- Ladybugs: 1500 per acre release
- Lacewings: Egg cards near infestations
- Nematodes: Water-in for soil pests
- Birds: Install nesting boxes
- Hedgehogs: Create brush shelters
- Bats: Nighttime pest control
Physical Barriers
- Collars: 4 inch (10 cm) root guards
- Netting: 0.04 inch (1mm) mesh
- Mulch: 3 inch (7.6 cm) straw layer
- Traps: Beer containers for slugs
- Fences: 24 inch (60 cm) height
- Reflectors: Aluminum foil strips
Monitoring
- Frequency: Twice weekly checks
- Tools: 10x hand lens
- Threshold: 10% leaf damage
- Records: Pest population charts
- Scouting: Underside inspection
- Traps: Pheromone lures
Chemical Controls (Last Resort)
- Selection: OMRI-approved pesticides
- Timing: Early morning applications
- Dosage: Follow label exactly
- Protection: PPE gear required
- Resistance: Rotate modes of action
- Disposal: Hazardous waste facilities
Watering and Climate Management
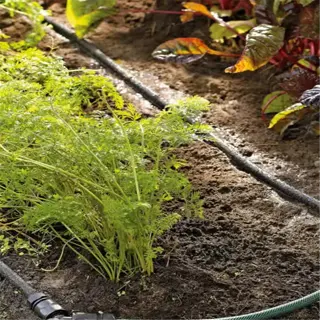
When it comes to Brussels sprouts, it is clear that drip irrigation is far better than flood methods. After I lost half of my first crop to root rot, I switched to an irrigation method using drip lines. They applied moisture directly to the oily roots and kept the leaves dry at the same time. I found I needed to run the system every day for 30 minutes in sandy soils, whereas in clay soils I only had to run it twice a week.
If not kept in check, humidity will turn your sprouts mushy. In my greenhouse trial last fall, I found that 60% humidity produced a firmer head than 80% humidity. The best way to handle humid weather patterns is to stock up on morning watering and straw mulch. Julie reminded me of last July's heatwave and to mist the paths instead of the plants, this way the foliage did not remain mushy.
Winter protection begins before the weather forecast. When temperatures drop below 28°F, wrap the stalks with burlap strips. I normally use old coffee sacks. In the event of an unexpected freeze, I bank soil around the base and then put out milk jugs filled with water. These types of jugs radiate heat as they freeze.
Adapt watering to the needs of your soil type. We have a sandy plot that receives 1.5 gallons of water per plant and week. My neighbor has clay soil which holds 2 gallons of water for 10 days. To determine the moisture level of your soil, probe down three inches. If the soil crumbles, it's time to water. If it's sticky, wait. A $12 moisture meter eliminates the guesswork.
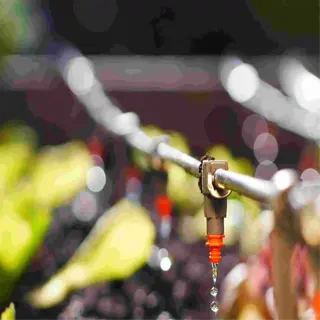
Drip Irrigation Kit
- Flow Rate: 0.5 GPH (1.9 LPH) emitters
- Spacing: 18" (45 cm) between drippers
- Pressure: 25-30 PSI (1.7-2.0 bar)
- Filter: 150 mesh minimum
- Timer: Programmable cycles
- Maintenance: Flush monthly
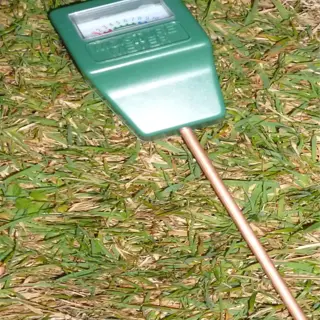
Soil Moisture Meter
- Depth: 8" (20 cm) measurement
- Scale: 1-10 drought index
- Calibration: Check against hand test
- Battery: 2-year lifespan
- Accuracy: ±2% volumetric
- Storage: Clean after use

Watering Can
- Capacity: 2 gal (7.6 L) size
- Rose: Removable brass head
- Material: Galvanized steel
- Spout: 12" (30 cm) reach
- Balance: Ergonomic handle
- Durability: 10+ year lifespan
Soaker Hose
- Application Rate: 1" (2.5 cm)/hour
- Material: Recycled rubber
- Length: 50 ft (15 m) sections
- Connection: Standard hose threads
- Durability: 5-year warranty
- Storage: Coil flat to prevent kinks

Hose Timer
- Programming: 8 customizable cycles
- Battery: 1 AA lasts 12 months
- Waterproof: IP67 rating
- Pressure: 150 PSI (10.3 bar) max
- Installation: Threaded connections
- Compatibility: Works with drip systems
Drought Strategies
- Mulching: 4" (10 cm) straw layer
- Shade Cloth: 30% UV block
- Windbreaks: 6' (1.8 m) barrier height
- Timing: Water at 5-7 AM
- Soil Prep: Add water crystals
- Varieties: Choose heat-tolerant
Humidity Control
- Spacing: 24" (60 cm) between plants
- Pruning: Remove lower leaves
- Circulation: Box fan setup
- Monitoring: Hygrometer tool
- Drip Tape: Avoid wet foliage
- Disease Watch: Prevent mildew
Frost Protection
- Cloches: 2 mil plastic covers
- Heat Lamps: 150W per 10 plants
- Water Walls: 5 gal (19 L) barrels
- Timing: Protect below 32°F (0°C)
- Row Covers: 1.5 oz/sq yd (50 g/m²)
- Recovery: Gradual warming
Heatwave Response
- Misting: 10 AM & 2 PM cycles
- Shade: 50% netting
- Foliar Feed: Seaweed extract
- Harvest: Pick smaller sprouts
- Mulch Refresh: Add 1" (2.5 cm)
- Monitoring: Leaf curl alerts
Seasonal Transitions
- Spring: Increase 0.5" (1.3 cm)/week
- Summer: Monitor evaporation
- Fall: Reduce by 25%
- Winter: Only if above 40°F (4°C)
- Tools: Weather station link
- Records: Log microclimates
Harvesting for Maximum Yield
Indications that your Brussels sprouts are ready, their firmness, and the tightness of the leaves are jade-green. I touch them every day if the lower sprouts become about the size of a quarter. The purple edges glazed with frost equals the peak flavor and should be harvested first. Do not wait for every sprout to reach the same size; the staggered harvest will improve your overall yield.
Begin harvesting continuously in the bottom-up direction. For the cleanest harvest, simply twist the sprouts upwards until they break. Top-down methods can shock the plant. My rows of trials convinced me that bottom harvesting provides an extension of 3 weeks in yield compared to improper.
After the final harvest, do not cut or remove any stalks. I have had stalks pushed out 20% more sprouts when they were not cut but left to stand (around six inches above soil). They will be smaller but sweeter. Cut the stalks back only after you see the spring greens appearing along the base (or bottom of the stalks).
Prune strategically. To conserve energy for sprouting, you need to remove yellowing leaves weekly. My biggest harvest of the season came after *topping the plants* three weeks before the first frost. Topping plants stops vertical growth and helps fatten already-formed buds. Use trimmed leaves for stir-fries, as they are full of nutrients for pre-sprouts.
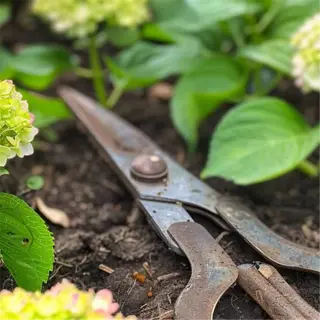
Pruning Shears
- Blade Type: Bypass for clean cuts
- Length: 8" (20 cm) reach
- Grip: Non-slip ergonomic handle
- Sanitation: Alcohol wipe between plants
- Sharpening: Weekly during season
- Storage: Hang blade-up
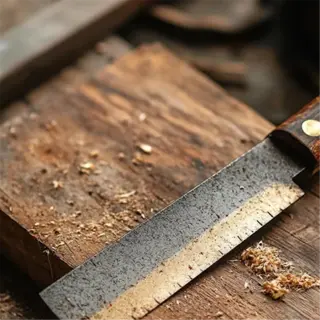
Harvest Knife
- Curvature: 30° serrated edge
- Steel: High-carbon stainless
- Guard: Finger protection ridge
- Cutting: Angled 45° to stalk
- Safety: Retractable sheath
- Care: Oil after each use

Collection Basket
- Material: Food-grade plastic
- Vents: 0.5" (1.3 cm) slots
- Capacity: 5 lbs (2.3 kg)
- Straps: Adjustable shoulder carry
- Cleaning: Hose-washable
- Stack: Nestable design

Magnifying Lens
- Magnification: 10x power
- Light: Built-in LED
- Focus: Adjustable diopter
- Battery: 100-hour runtime
- Weight: 4 oz (113 g)
- Case: Belt-clip holster

Chilling Tote
- Cooling: 4 ice packs included
- Liner: Waterproof nylon
- Capacity: 10 lbs (4.5 kg)
- Straps: Padded cross-body
- Warranty: 2-year coverage
- Cleaning: Machine washable
Immediate Care
- Cooling: 34°F (1°C) within 2 hours
- Trimming: Remove outer leaves
- Grading: Sort by 0.25" (0.6 cm)
- Hydrocooling: 20-minute dip
- Drying: Mesh racks 30 mins
- Storage: Perforated bags
Long-Term Storage
- Temperature: 32°F (0°C) constant
- Humidity: 95% RH maintained
- Ethylene: Keep away from apples
- Containers: Waxed cardboard
- Duration: 6-8 weeks maximum
- Check: Weekly for yellowing
Stalk Regrowth
- Cut Height: 6" (15 cm) above soil
- Fertilizer: 5-10-5 NPK side-dress
- Water: 1.5" (3.8 cm)/week
- Timing: 4 weeks before frost
- Pests: Apply neem oil spray
- Yield: 30% of first harvest
Seed Saving
- Selection: Best 10% sprouts
- Drying: 2 weeks in dark
- Cleaning: Winnow chaff
- Storage: Mylar with silica
- Viability: 5-year lifespan
- Label: Date/variety/zone
Quality Control
- Firmness: 2-lb (0.9 kg) pressure
- Color: Uniform green no yellow
- Size: 1-2" (2.5-5 cm) diameter
- Brix: 6-8% sugar content
- Defects: <5% surface damage
- Packaging: Clamshell vents
5 Common Myths
Brussels sprouts will produce a good yield only if grown in full-sun locations all day
Brussels sprouts can use about 6 hours of full sunlight every day, but afternoon shade is better. In hot climates, afternoon shade can prevent bolting (going to seed). In fact, morning sunlight with shade in the afternoon (when the temperatures are above 80F/27C) will even improve sprout formation while preventing bitter flavors often caused by heat stress.
When it comes to growing Brussels sprouts, more nitrogen fertilizer means bigger sprouts.
However, too much nitrogen will give you lots of leaves at the expense of sprout growth. A balanced 5-10-10 NPK fertilizer applied at planting and again at 6 weeks later will enhance growth of Brussels sprouts. Too much fertilizers can lead to hollow stems, and become more susceptible to pest attack as well as become less tolerant to frost.
Brussels sprouts that have been harvested after frost are damaged and inedible.
Light frost (28-32F/-2-0C) can actually improve flavor by turning starch into sugars. Plants can withstand temperatures of down to 20F/-7C, if properly hardened. The best Brussels sprouts are the ones picked after 2-3 light frost's increasing their sweeter, nuttier flavor that chefs prefer.
It isn't possible to successfully grow Brussels sprouts in a container.
Dwarf varieties like 'Oliver' perform excellently in a 10-gallon (38-liter) container with regular care. Use of well-drained potting mix is suggested; stake plants as needed, and always keep wonton moisture. One of the benefits of growing sprouts in containers is that they often have fewer pests and can be moved to provide more light, if needed.
Pruning Brussels sprout plants reduces overall yield potential.
Strategic pruning of lower leaves when sprouts form improves air circulation and directs energy to sprout development. Remove yellowing leaves weekly and top plants 3 weeks before harvest to synchronize maturity. Proper pruning increases yields by 20-30% in trials.
Conclusion
The initial part of successful Brussels sprout cultivation is soil prep. I had my first successful harvest only after balancing boron levels. Those first stunted plants demonstrated to me that pH meters are more important than shiny farming tools. Test, amend, repeat. This process develops a root system that can withstand cold winter winds and summer droughts.
Fiercely adapt to your climate. Growers in Zone 5 should time the planting according to October frost kisses. To help harvest in Arizona, my cousin uses 30% shade cloth over her crop in the autumn. Both strategies respect local conditions while pursuing the unmistakable sweet crunch that only homegrown sprouts offer.
It's never a bad strategy to embrace frost rather than fear it. That first hard freeze changes boring lumps into caramelized wonders! I sample once a week after a frost, and at 28°F nights, I notice the nutty base flavors become more pronounced. One area of food science understanding is that the cold can be the ally and not the enemy.
Even in a state of perfection, pests can hide. Inspection of the undersides of leaves each week prevented aphid infestation in my crop last fall! Companion planting marigolds bought time; however, constant vigilance secured the ultimate victory. Always remember that one missed cluster of eggs can turn into an army. Your attention is the best organic pesticide!
External Sources
Frequently Asked Questions
What's the key to successful Brussels sprout cultivation?
Successful Brussels sprout growth requires boron-rich soil with a pH of 6.2-6.8, consistent moisture via drip irrigation, and pest control using row covers. Time planting so sprouts mature after light frosts for enhanced sweetness. Key steps:
- Test soil before planting
- Space plants 24-36 inches apart
- Apply balanced fertilizer at 4 & 8 weeks
Are Brussels sprouts suitable for beginner gardeners?
Brussels sprouts require patience due to their 80-100 day growing season but are manageable for beginners with proper planning. Focus on:
- Cool-season planting schedules
- Consistent pest monitoring
- Frost protection techniques
Can I grow Brussels sprouts in containers?
Yes, dwarf varieties thrive in 10-gallon containers with well-draining soil. Ensure:
- Daily sun exposure
- Staking for vertical support
- Frequent watering in heat
What companion plants should I avoid near Brussels sprouts?
Avoid strawberries, tomatoes, and pole beans nearby. These plants:
- Attract shared pests like aphids
- Compete for soil nutrients
- Increase disease risks
Why aren't my Brussels sprout plants producing heads?
Failure to form sprouts typically stems from overcrowding, excessive nitrogen, or inconsistent watering. Solutions include:
- Thinning seedlings early
- Switching to phosphorus-rich fertilizer
- Using mulch for moisture retention
Do Brussels sprouts require full sunlight?
Plants need 6+ hours of daily sun but benefit from afternoon shade in zones 7-10. Morning sun prevents heat stress while maintaining steady growth.
How many sprouts can one plant yield?
Healthy plants produce 20-40 sprouts over 6-8 weeks. Maximize yield by:
- Topping stalks 3 weeks pre-harvest
- Removing yellowing leaves
- Applying boron supplements
Is fall frost beneficial for Brussels sprouts?
Light frosts improve flavor by converting starches to sugars. Protect plants with burlap if temps drop below 20°F. Harvest sprouts progressively after 2-3 frosts for peak sweetness.
What's the ideal fertilizer for Brussels sprouts?
Use 5-10-10 NPK fertilizer at planting and mid-season. Avoid high nitrogen formulas that promote leafy growth over sprout development. Supplement with compost tea every 3 weeks.
Can I grow Brussels sprouts from grocery store produce?
While possible to regrow from cuttings, store-bought sprouts often lack vitality. For reliable results:
- Purchase disease-resistant seeds
- Start transplants indoors
- Harden off before planting