How to Grow Blueberries: 7 Essential Steps for Success

Written by
Benjamin Miller
Reviewed by
Prof. Samuel Fitzgerald, Ph.D.Growing blueberries -- its important to have acidic soil (ph 4.5-5.5) for successful production
Plant in full sun (6+ hours) with 5-6 feet between plants to reduce disease risk
Remove 20% of the oldest canes each year, it will assist in fruit production
Organic mulch, such as pine needles, retain soil acidity
Proper irrigation with drip irrigation will help prevent overwater, 1-2 inches a week is recommended
Netting and using neem oil will help deter birds/pests without using chemicals
Article Navigation
The beginning of growing blueberries begins with an understanding of their specific needs. Homegrown blueberries have higher levels of vitamin C and fiber than berries from the grocery store. The first and necessary condition is that the soil should be acidic. Think of knowing this as the foundation of your plant's sustainable growth. If you can ensure this, you will have greater than a fifty percent chance of having productive plants.
Soil pH is more important than you probably even realize. Blueberries will never grow in a neutral or alkaline environment. I learned this after my first bushes turned yellow after I had the soil analyzed. You should always get the soil amended. The answer is sulfur or peat moss to lower the pH to the ideal range of 4.5 to 5.5.
Pruning determines the size and shape of your harvest. When you are just beginning to prune, or if you have never pruned before, it can be scary to think about cutting away part of your plant, but a well-timed cut will improve your yield. Prune out a little old wood each year to allow sunlight to reach new growth. Gardening in containers? Look for dwarf plants like Top Hat. Dwarf plants will flourish if you can maintain forest floor acidity in your pots.
Patience is rewarded. Your first berries may take two years, but you will be rewarded for your patience. Birds will test your patience. Cover the fruit from the birds with netting. Water well, but don't leave the roots soggy. Striking that balance is the difference between a mediocre harvest and a basket full of homegrown sweetness.
Choosing the Right Blueberry Varieties
Learning how to grow blueberries starts with the successful selection of a plant compatible with your local climate. For example, Cold-hardy types, such as Bluecrop, can grow in USDA zones 4-7, surviving winter lows of around -30°F. The heat-tolerant Misty is an option for planting in USDA zones 5-9. Check zone maps from USDA or your local nursery to avoid expensive disappointment.
Your planting approach will depend on pollination requirements. Duke blueberries need to be cross-pollinated; to ensure heavier berry yields, I recommend pairing with cultivars such as Bluecrop or Legacy. I have seen single-variety plantings only yield scant fruit. Planting two cultivars will guarantee there are enough bees to transfer pollen, which in turn creates bigger berries and longer harvesting time.
City gardeners, here's a new one for you: Top Hat. This dwarf variety works well in an 18-inch pot, making it a perfect candidate for patios. The fact that it's a dwarf blueberry makes it easier to pH manage, which is always a challenge in containers. You'll want to start with a nice acidic potting mix and control moisture levels closely. I've grown Top Hat on a fire escape, and was very pleased with the results.
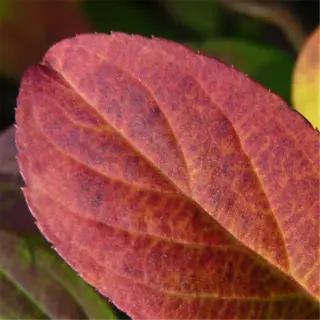
The Pink Lemonade blueberries blend aesthetic value with their utility as "edibles." The berries are blush-colored while the foliage is bright red in the fall color; both features contribute to beautifying the edible landscape. Plant near pathways for maximum aesthetic value. Primer varieties will lose their leaves in a mild winter, Pink Lemonade Blueberries will retain their leaves and visual interest year-round in the garden.
Stay away from ornamental traps. Many hybrids put priority on outward appearance over flavor. Choose proven cultivars and only experiment with them. To help ensure future harvests, you need to have a balance of new varieties and traditional stands like Jersey or Patriot (both of which have great flavor). Your taste buds and jam recipes will thank you.

Top Hat Dwarf
- Size: 18-24 inches tall | 20-inch spread
- Yield: 2-3 lbs (0.9-1.4 kg) per plant in containers
- Use: Balcony/patio gardens | Acidic potting mix required
Legacy Northern Highbush
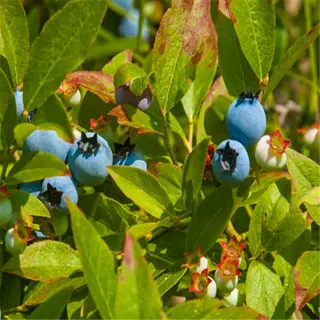
- Cold Tolerance: Survives -20°F (-29°C) winters
- Fruit: Large, firm berries | 8-10 lbs (3.6-4.5 kg) yield
- Pollination: Requires Jersey or Bluegold varieties

Sunshine Blue
- Evergreen Foliage: Retains leaves year-round in mild climates
- Height: 3-4 ft (0.9-1.2 m) | Self-pollinating
- Soil: Tolerates pH up to 6.5 temporarily

Pink Lemonade
- Unique Color: Ripens from green to pink
- Landscape Value: Scarlet fall foliage adds visual interest
- Harvest: Late July to August in most zones
Jersey (Northern Highbush)
- Heritage Variety: Developed in 1928 for reliability
- Yield: 5-7 lbs (2.3-3.2 kg) annually at maturity
- Disease Resistance: Tolerates root rot better than most
Soil Preparation and pH Mastery
Becoming proficient in soil prep begins with selecting a proper acidifier. Elemental sulfur takes time to work, but it will last for years in the soil, which is optimal for heavy clay soils. In contrast, peat moss will acidify more quickly, but it will only last one growing season. I tend to use both products in my garden, elemental sulfur for the long-term benefits, and peat moss for the immediate pH drop when I am planting.
Conduct pH tests for soil at 30-day intervals post-amendment. Sandy soils will leach excess acidity faster hence the need for quarterly soil pH checks. Clay will belt hold pH more firmly so you'll only need to check on a biannual basis. I always store a simple $12 meter in my tool shed. If you see yellow leaves appear that is iron chlorosis urgently seeking fixes for pH below a 5.5.
Pine needles are more than just attractive mulch. As they break down they leach weak acids that gradually drive pH down over months. Apply in a 3-inch layer around plants but ensure at least 6 inches is left from the plant stems and where the crown emerges from the ground. When dealing with stubborn alkaline soils I will often use sulfur in combination with the pine needles. I've revived dying bushes with the method.
Alkaline soils will lock out the availability of iron to plants, which can starve them of this essential nutrient. Plants can get a quick shot of iron with chelated iron spays, however, a long-term solution would be to modify the pH. I dig 1 cup of iron sulfate into the root zone for every bush. If you're in an urgent situation, foliar sprays will green the leaves in a few days; I have done this during harvest and saved my horticultural efforts.
Testing & Analysis
- Lab Test: Mail soil sample to extension service ($15-$30)
- Home Kit: Test 4-6 soil samples from different areas
- Ideal pH: 4.5-5.5 | Retest every 3 years
Acidification Methods
- Sulfur Application: Works best 6+ months before planting
- Vinegar Hack: 1 cup white vinegar/gal (236 ml/3.8 L) water for quick pH drop
- Coffee Grounds: 4-6 cups (0.95-1.4 L) per bush annually
Drainage Solutions
- Raised Beds: 12-18" height (30-45 cm) for clay soils
- Sand Mix: 30% coarse sand to improve aeration
- French Drain: Install 6" deep (15 cm) gravel trenches
Organic Matter Integration
- Compost Addition: 3-4" (7.6-10 cm) of acidic leaf compost
- Peat Moss: Mix 1:1 with native soil in planting holes
- Avoid Manure: High pH risks alkalinity spikes
pH Monitoring & Maintenance
- Digital pH Meter: Check monthly during growing season
- Liquid Sulfur Drench: For emergency pH corrections
- Annual Mulch Refresh: Replenish pine needles every fall
Planting Blueberries for Long-Term Success
Container planting is a great option for limited space, but it requires vigilance. The roots will tightly circle the pot, which will necessitate you to prune the roots every year (unless you are glad to replace them). You will also need to refresh the potting medium with an acidic mix every year. Ground planting helps roots expand freely, and you can preferably keep the natural soil acidity. I have done both. Containers thrive on decks while in-ground bushes will produce in year three and beyond.
Bare-root plants will need deeper holes than potted ones. For bare-root plants, the holes you dig should be 18 inches wide and 12 inches deep, allowing the crown to be about 1 inch above the soil level. For potted plants, dig the same depth as the container removed for potted plants, but double the width of the pot. If the roots are crowded, it may stunt the growth of the plant. I have rescued plants in the past by scoring the root ball once the plant was removed from the container.
Gardeners in USDA Growing Zone 3 plant in late spring once the risk of frost has passed. Gardeners in Zones 7, 8, and 9 can plant in the fall since the cool weather allows the root system to establish without summer heat stress. I lost two bushes in Minnesota because I planted too late, timing and planting conditions matter. Be sure to check your local frost dates and soil temperature to ensure the soil is above 50°F.
If root crowns are planted too deep, they become prone to rot. Place the crown on the flare point, the place where the roots meet the stem, just above the soil level. Lightly mulch just around it. I have found with my Duke's crown after heavy rain washed away the soil that I had put over the crown, I knew to look for rot when I noticed wilting leaves. If this occurs, you can carefully lift the plant and replant it.
Site Preparation
- Sun Exposure: 6-8 hours daily | Morning shade in hot climates
- Wind Protection: Install 4 ft (1.2 m) windbreaks for young plants
- Soil Test: Confirm pH 4.5-5.5 before digging
Hole Preparation
- Width: 2x root ball size | 24" (61 cm) for mature bushes
- Backfill Mix: 50% peat moss + 25% native soil + 25% pine bark
- Drainage Test: Fill with water - drains in <2 hours
Root Care
- Bare-Root Soak: Submerge 2-4 hours before planting
- Pot-Bound Roots: Score vertically with knife to encourage growth
- Depth: Keep crown 1" (2.5 cm) above soil line
Mulching
- Material: 4" (10 cm) pine needles or oak leaves
- No-Touch Zone: Keep 3" (7.6 cm) from stems
- Refresh: Annually before winter dormancy
Post-Planting Care
- First Pruning: Remove 50% of flower buds
- Watering: 1 gallon (3.8 L) daily for first 3 weeks
- Frost Protection: Cover with burlap if <28°F (-2°C)
Watering, Feeding, and Mulching
Drip irrigation is more efficient than soaker hoses in conserving moisture. Drip irrigation delivers water directly to the plant roots while reducing evaporation and minimizing runoff. While soaker hoses are better for temporary beds, they can result in surface moisture run-off. I switched my beds from soaker hoses to drip lines after losing half my crop due to less than adequate watering. Now, plants do much better despite periods of unusual drought.
Organic fertilizers such as fish emulsion slowly feed the soil microbes to eventually build soil health long-term. Synthetic fertilizers are quick fixes but will deplete nutrients over time. For instance, my neighbor's bushes that were fertilized with synthetics turned yellow within the season, while my bushes received compost, which resulted in sweeter berries. If you want to create lasting results, find a balance between productivity and sustainability.
The thickness of the mulch affects the safety of the roots. A thickness of 3-4 inches of pine needles holds the soil temperature in check, preventing summer scorch and winter freeze damage to roots. When piles of mulch are maintained against the stems of trees and shrubs, it encourages rot, so keep the mulch back at least 2 inches. I found that my mulched beds were at least 10°F cooler than bare soil after every heatwave.
Symptoms of overwatering depend on soil type. For instance, clay soils retain water, causing yellow leaves and a lack of vigor. Sandy soils drain too quickly; the plants can be dry in the soil even after watering frequently. You can test the soil, by inserting a finger or probe into the soil for about 6 inches. If the soil clumps and does not fall apart, wait. In my garden, I rescued bushes that were sitting in saturated clay soil by mixing in perlite and reducing the watering schedule.
Spring Nutrition
- Pre-Bloom Feed: 1 oz (28g) ammonium sulfate per plant
- Mulch Refresh: Add 2" (5 cm) compost under existing mulch
- pH Check: Test soil 2 weeks after fertilizing
Summer Watering
- Heat Waves: Increase to 2 gal/day (7.6 L) for 3+ days >90°F (32°C)
- Fruit Swelling: Add ½ tsp (2.5ml) Epsom salt/gal water weekly
- Mulch Check: Maintain 4" (10 cm) depth to retain moisture
Fall Preparation
- Last Feed: 8-8-8 fertilizer 6 weeks before first frost
- Winter Mulch: Top with 6" (15 cm) straw over existing layer
- Moisture Charge: Deep water before ground freezes
Winter Protection
- Wind Barriers: Burlap wrap for zones below 5
- Rodent Deterrent: Spread blood meal around base
- Snow Mulch: Leave accumulated snow on beds
Year-Round Tips
- Container Plants: Use moisture meter (ideal 4-7 on scale)
- Acidification: 1 tbsp (15ml) vinegar/gal water monthly
- Leaf Signs: Yellowing = overwatering | Crisp edges = thirst
Pruning and Pest Solutions
To redirect energy to fruit production, the Summer pruning is a practice I use. In summer, especially in June, I will thin crowded canes to allow more sunlight and airflow into the nest-growing space. For Winter pruning, I remove any dead or diseased wood and shape the bush before it pushes new growth in the spring. I generally think of cutting back larger canes after the frost has passed but before the buds start to swell so that plants have more time to recover from cutting.
The development of organic pest management starts with preventative practices. Aphid breeding cycles are disrupted by neem oil while leaving bees unharmed. For spotted wing drosophila, trapping with apple cider vinegar should be utilized in early summer. I have not used insecticides in the last ten years, and have found that healthy soil and balanced ecosystems deter the majority of pest invaders in nature.
Plan prudent pruning cycles that can interrupt the pest life cycles. Cutting infested canes in late winter will remove the insects before the eggs hatch in the spring. Always burn or bag the pruned leaves and canes, never compost them. After I lost an entire crop to insects (borers) last year, I now prune two weeks earlier in Zone 5, which is often effective in interrupting the timing of the insect's emergence.
Birds will pick berries clean overnight. When the flowers fade, you can put up ¼-inch mesh netting, and weight the edges down with rocks. For rodents, you can wrap trunks in metal hardware cloth. I put pruning debris into brush piles a little bit away from the bushes, this attracts mice and voles to traps and away from a fruit harvest.
Year 1-2
- Goal: Establish structure | Remove 100% flower buds
- Cut: Crossed/rubbing branches at base
- Tool: Sterilize shears with 70% alcohol
Year 3-5
- Goal: Increase air flow | Thin center
- Cut: 30% oldest canes | 6+ year-old wood
- Timing: Late winter before bud swell
Mature Plants
- Goal: Renewal pruning | 20% annual removal
- Cut: Gray-barked canes >1" diameter
- Sealant: None needed for clean cuts
Pest-Related Pruning
- Borers: Cut 6" below tunnel signs
- Cankers: Remove 12" beyond discolored wood
- Dispose: Burn/bag infected material
Tool Maintenance
- Sharpening: File at 20° angle weekly
- Rust Prevention: Wipe with mineral oil
- Storage: Hang in dry, ventilated area
5 Common Myths
Blueberries preferably grow with any acidic mulch like pine needles by themselves.
Pine needles help, but soil pH must be between 4.5-5.5 with sulfur amendments. Mulch can only maintain acidity in the soil for only so long, so annual soil testing and targeted acidification are essential for the plants' health.
Pruning should minimize yield, so do not cut any healthy branches.
If done strategically, pruning can enhance berry size and longevity of the plant. By removing 20% of old canes each year, you can focus the plant's energy towards fruit production instead of growth. Unpruned bushes can develop a dense canopy of unproductive growth that makes the plant susceptible to disease.
Sensitive to the modern pest called spotted wing drosophila, wild blueberries are more precarious than cultivated varieties.
Cultivated varieties are bred for a significant yield and disease resistance- wild blueberries are often difficult outside native habitats with more exacting pH and need for protection from other pests.
Watering every day makes for juicier berries when fruiting time comes.
Too much water causes root rot, diluted flavor, or even death to the plant. You can provide 1-2 inches of water a week through a drip system, increasing only in a drought situation. Feel the soil; it should feel like you just wrung out a sponge, moist but not dripping wet.
All-purpose fertilizer works if you add extra iron.
Blueberries can't process nitrate-based fertilizers. Ammonium sulfate (21-0-0) is essential, it acidifies soil while feeding. Iron supplements alone won't compensate for improper NPK ratios or high pH.
Conclusion
While it may initially seem complicated, with a little pre-planning it will be easy to grow blueberries. You need to focus on three non-negotiable pillars: soil ph, the right to consistent pruning, and organic amendments. If you can get these 3 pillars down, you will erase at least 90% of the issues you will face as you start on your blueberry journey. My recommendation is to start with two bushes (a Duke and a Pink Lemonade) to build confidence and eat blueberries; this will keep things manageable for those with less patience and their intimidation.
Soil acidity is non-negotiable. It must be tested every year, managed with sulfur in the spring and/or peat moss in the fall, and periodically watched for signs of iron chlorosis. Prune on an annual basis and remove all the old growth in winter. In the summer, thin out crowded stems or branches to allow for better absorption of nutrients. My first neglected bush taught me all of this and to not take shortcuts, but to provide disciplined care and sustain and reap the harvest.
A patient approach is what translates to blueberry success. In your first year, you can look forward to handfuls, three years in, you'll have enough to fill a colander, and by year five, you'll be sharing baskets with your neighbors. Container plants peak in production fastest, but they remain small plants. In the long haul, ground-planted bushes are more rewarding. Regardless, the years of waiting and training yourself to appreciate every berry will enhance your journey to the plentiful blueberries.
Start with small-scale production. Choose one early-season and one late-season variety to lengthen your harvest. Consider adding a third bush as your pH balance skills develop. Blueberries will grow with you; as the season progresses your skills will develop. The work becomes lighter as you harvest fruit you've grown, rich with flavor.
External Sources
Frequently Asked Questions
How do you grow blueberries for beginners?
The key steps to grow blueberries include:
- Test and adjust soil pH to 4.5-5.5 using sulfur or peat moss
- Plant in full sun with 5-6 ft spacing for airflow
- Water consistently with drip irrigation to avoid root rot
- Prune annually to remove old growth and improve yields
How long does it take a blueberry bush to produce fruit?
Blueberry bushes typically produce a small harvest in their second year, with yields increasing annually. Mature plants reach peak production at 5-7 years, yielding 5-15 lbs of fruit depending on variety and care.
Should you plant blueberries in pots or ground?
Pots work well for small spaces or pH control, while ground planting suits larger gardens. Containers require acidic potting mix and frequent watering, whereas in-ground plants need well-drained soil amended with organic matter.
Where is the best place to plant blueberry bushes?
Ideal locations provide:
- 6-8 hours of direct sunlight daily
- Well-draining soil with acidic pH
- Protection from strong winds
- Space for air circulation to prevent fungal issues
Why are blueberry bushes so hard to grow?
Common challenges include:
- Soil pH outside the 4.5-5.5 range
- Overwatering leading to root rot
- Bird/pest damage without netting
- Insufficient pruning reducing fruit production
How do I encourage my blueberry bushes to produce fruit?
Boost fruit production by:
- Applying ammonium sulfate fertilizer in early spring
- Ensuring cross-pollination with multiple varieties
- Removing weak branches to focus energy on fruiting
- Covering plants with netting to protect developing berries
Can you grow blueberries in a 5 gallon bucket?
Yes, but use a 20-gallon container for mature plants. Smaller pots restrict root growth and dry out quickly. Ensure drainage holes and acidic potting mix, and water daily during growing seasons.
Do blueberries need coffee grounds?
Coffee grounds can lower soil pH slightly but must be composted first. Overuse causes mold and nitrogen imbalance. Pair with elemental sulfur for reliable acidity control and add pine needles as mulch.
What is the secret to growing blueberries?
Success hinges on three factors:
- Strict soil pH management (4.5-5.5)
- Consistent moisture without waterlogging
- Annual pruning to renew productive wood
- Protection from birds using netting
How often should I water blueberries?
Water deeply 2-3 times weekly, providing 1-2 inches total. Increase frequency during droughts or for container plants. Use a moisture meter to maintain damp-but-not-soggy soil, critical for nutrient uptake and root health.
