Garden soil testing refers to the process of testing and analyzing your soil to optimize its growth for your plants. It's similar to a health check for your garden. You get to find out exactly what nutrients are in your soil. You get to know what the soil might need. This way, you are preventing wasteful spending on fertilizers that your soil doesn't need.
Testing protects both your money and the environment. You won't over-fertilize and burn plants or run off fertilizers into water. You'll conserve resources and use water wisely, depending on what you learned about your soil's drainage. Healthier plants will reduce pest problems and yield a better overall harvest.
We talk about simple DIY methods you can try at home. We also discuss professional lab testing options. We debunk soil care myths. Whether you grow vegetables or flowers, this guide makes soil science accessible to all types of gardeners.
Do-It-Yourself Soil Testing Methods
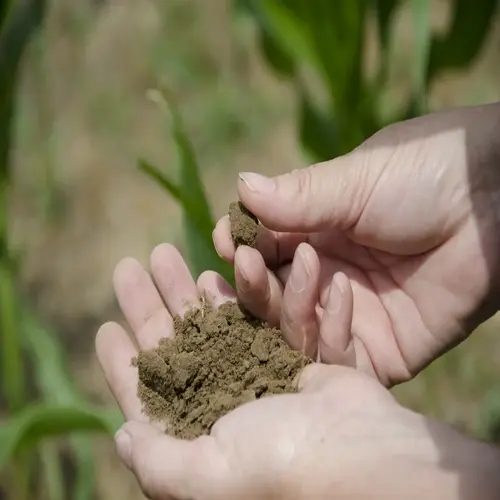
First, let's try the squeeze test to evaluate your soil texture. Take a handful of wet soil. Not soaked but wet. Use a firm squeeze in your hand. If it forms a tight ball and retains its shape, you have clay soil. If it falls apart instantly, you have sandy soil. Loam soil holds its shape for a second before breaking apart.
For a detailed texture analysis, try a jar sedimentation test. Fill a clear jar with soil to the one-third mark. Pour water into the jar until the water reaches two-thirds of the mark. Shake the jar vigorously and allow it to settle for 24 hours. Sand will pay first, then silt, and then clay. Measure the three layers of settled sediment using a ruler, and use the individual measurements to calculate percentages of each.
Evaluate your outcomes. Sandy soils drain quickly but often require irrigation. Clay has good nutrient retention but has slow drainage. Loam provides the best of both worlds. Please remember that these tests do not measure nutrients or contaminants. They only offer a general texture profile to begin planning your garden.
These DIY techniques can help clarify your conditions for water retention and root development. They should be used before planting new beds. If you want a specific nutrient value or contaminant verification, you can always conduct a laboratory test afterwards. Your empirical observations provide the perfect counterbalance to scientific evaluation.
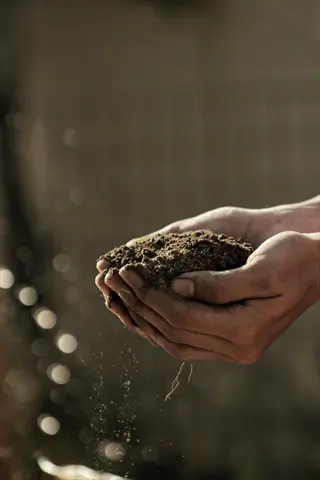
Hand Grab Test
- Step 1: Collect soil from 6 inches (15 cm) deep using a clean trowel when soil is moist but not wet
- Step 2: Squeeze firmly for 5 seconds to form a ball in your palm with moderate pressure
- Observation: Ideal loam holds shape briefly then crumbles easily when touched with minimal residue
- Observation: Clay soil forms dense, sticky clump that maintains shape and resists breaking apart
- Observation: Sandy soil won't form cohesive ball and feels gritty with grains separating quickly
- Accuracy Tip: Test multiple garden areas at consistent depth and moisture level for reliability
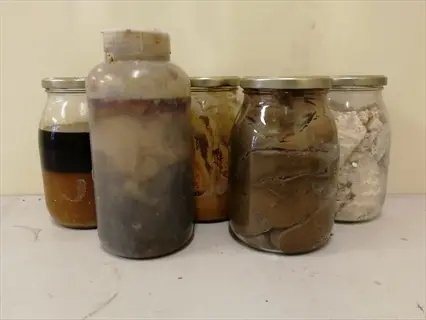
Mason Jar Test
- Step 1: Fill clear quart jar one-third full with dry, crushed garden soil free from roots
- Step 2: Add water until jar is nearly full plus teaspoon dish soap to separate particles
- Step 3: Shake vigorously for 3 minutes then place on flat surface completely undisturbed
- Observation: Coarse sand settles in bottom layer within 1 minute forming distinct band
- Observation: Silt forms smooth middle layer after 4-6 hours of settling time
- Observation: Clay appears as milky top layer after 24-48 hours of sedimentation
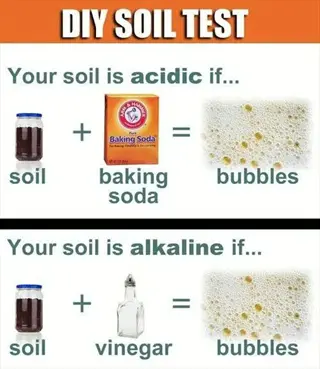
Vinegar/Baking Soda Test
- Step 1: Divide soil sample into two separate clean containers labeled clearly for identification
- Step 2: Add 120 ml (4 oz) vinegar to first sample and observe immediate reaction for bubbling
- Observation: Vigorous fizzing reaction indicates alkaline soil with pH between 7.1 and 8.5 requiring lime adjustment
- Step 3: Moisten second sample then add 120 ml (4 oz) baking soda solution to the damp soil
- Observation: Visible fizzing reaction indicates acidic soil with pH between 5.0 and 6.0 requiring sulfur amendment
- Accuracy Note: This shows approximate pH range only without numerical precision for gardening decisions
How to Collect Soil Samples
Take samples of areas at various depths depending on your plants. For turf, take samples 4-5 inches deep where turf grass roots are feeding. For vegetable gardens, a depth of 6-8 inches is recommended. For trees, 6-10 inches deep within the drip line. When taking samples, always use clean stainless steel tools to avoid zinc contamination, which can skew the results.
Prevent contamination by using plastic buckets instead of metal ones. Wipe your tools with alcohol in between samples. Remove any roots, rocks, or debris immediately. I once had a test ruined by a rusty trowel, and now I have dedicated sampling tools. Your samples need to be pure soil.
For accuracy, use a composite sample. Take 10-15 subsamples throughout the planting area, using a zigzag pattern. Mix them well in your bucket. This ensures that you balance the differences in organic matter and nutrients. One sample will not represent the true condition of your garden. Mix it up just like preparing a soil smoothie!
Apply a one-inch layer of blended soil onto newspaper before letting it dry. Do not use an oven or microwave, as heat can alter the nutrients in the food. Store samples in paper bags, not plastic ones. Label each sample properly, such as 'Tomato Bed North'. Ship samples Monday through Wednesday to ensure labs receive them fresh.
Essential Tools
- Plastic bucket: Must be chemical-free and residue-free to prevent metal contamination in soil samples
- Soil probe or trowel: Use stainless steel tools to avoid zinc or aluminum leaching into collected samples
- Labels/marker: Waterproof labels for clear sample identification during various weather conditions
- Paper bags: For proper air-drying without plastic interference that could alter test results
Sampling Depth Guidelines
- Lawns: 4-5 inches (10-12 cm) depth matching primary grass root absorption zone
- Vegetable gardens: 6-8 inches (15-20 cm) where feeder roots absorb water and nutrients
- Trees/shrubs: 6-10 inches (15-25 cm) near drip line where active roots gather nutrients
- Containers/raised beds: Entire root ball depth typically 6-12 inches (15-30 cm)
Collection Procedure
- Subsamples: Collect 10-15 samples per distinct garden area using systematic zigzag pattern
- Technique: Insert probe vertically at consistent depth each time for comparable results
- Debris removal: Immediately exclude rocks, roots and organic matter from all samples
- Wet conditions: Avoid sampling after rain when soil water content exceeds field capacity
Sample Preparation
- Mixing: Thoroughly blend subsamples in plastic bucket for homogeneous nutrient distribution
- Drying: Spread soil in 1-inch layer on newspaper for 24 hours at room temperature
- Volume: Fill lab bag with 1-2 cups (240-480 ml) of representative mixed soil sample
- Avoid: Never use ovens or microwaves which chemically alter nutrient composition
Labeling & Shipping
- Identification: Clearly label samples with specific location like North Vegetable Bed
- Documentation: Record crop types and recent fertilizer applications on submission forms
- Packaging: Use lab-provided bags or double-layer paper to prevent moisture damage
- Timing: Ship Monday-Wednesday to ensure weekend-free lab processing for fresh analysis
Professional Lab Testing Explained
University extension laboratories such as Penn State provide research-based soil testing for a lower fee. They provide regional recommendations tailored to your local garden. Private labs often boast faster results, typically within 3 to 5 days. They have detailed contaminant screening that extension services may not have access to.
Select a standard test package for basic nutrient levels - including NPK and pH - then add micronutrient analysis if plants exhibit signs of deficiencies. Urban gardeners should also include heavy metal screening. I learned the hard way after finding lead in my community garden plot. Testing protects your family.
Most labs will respond with reports within 7 to 14 days. Expect to see color-coded charts and optimum ranges. You'll receive recommendations with the exact amendment amounts per 1,000 sq. ft. If it's a digital report, it may also provide access to consultants. Save your report for future comparison of test results.
Heavy metal testing is most critical in urban environments, especially near old paint factories and areas with high traffic pollution. Contaminants such as lead, arsenic, or cadmium can remain in the soil. Testing will indicate whether toxic levels of lead, arsenic, or cadmium exist before growing any edibles. Retest every three years. Contaminants could also appear over time. Safety is the most important.
University Extension Labs
- Examples: Penn State, UF/IFAS, University of Minnesota
- Pros: Research-backed recommendations, crop-specific advice, regional adaptation
- Cons: Limited off-season hours, slower peak-season turnaround times
- Best for: Home gardeners needing localized nutrient levels guidance
Private Testing Services
- Examples: Waters Agricultural Labs, Spectrum Analytic
- Pros: Faster results (3-5 days), specialized contaminant testing options
- Cons: Higher costs for comprehensive soil health packages
- Best for: Commercial growers requiring detailed organic matter analysis
Submission Process
- Step 1: Request kit from extension office or download forms online
- Step 2: Mail dried soil samples with completed forms and payment
- Step 3: Receive digital/printed report within 7-14 business days
- Tip: Include specific growing plans for tailored nutrient recommendations
Report Interpretation
- Nutrient levels: Color-coded bars visually indicate optimal, deficient and excessive ranges
- Recommendations: Lime/fertilizer amounts per 1,000 square feet (93 m²) area
- Contaminants: Clear indicators for unsafe heavy metal concentrations
- Support: Lab agronomists available for phone consultations about results
When to Choose Premium Tests
- New properties: Heavy metal screening ensures food safety before planting edibles
- Persistent plant issues: Micronutrient analysis identifies hidden deficiencies
- High-value crops: Complete nutrient profiling for orchards or vineyards
- Salty soil regions: Electrical conductivity testing measures salt accumulation risks
Interpreting Soil Test Results
Your soil's pH level is what determines what kinds of plants will do well. Acidic soil with a pH of 5.5 works well for blueberries, but seals up nutrients from vegetables. A pH level of 6.0 to 7.0 is ideal for most garden plants. Alkaline soil with a pH above 7.0 will require sulfur to support tomato growth. Ensure that you test every year, as the pH level can often be influenced or altered by rain and amendments.
Reports utilize color-coded bars for nutrient levels. Green indicates the best levels. Red indicates a deficiency that requires correction. Orange alerts suggest that you have too much, which could burn your plants. Organic matter is percentage-based. Less than 3% could require compost. I once disregarded orange levels, and all my tomato plants died due to fertilizer burn.
Cation Exchange Capacity indicates how much nutrients are retained by your soil: Sandy soils under 10 are better fed lightly and frequently, while loamy soils with a range of 11-20 will retain nutrients moderately, and clay soils with a number over 21 will hold onto nutrients well but are limited aerations wise. Soils that have a higher CEC will allow you to limit waste of fertilizer. Find amendments that are appropriate to this number.
Carefully check contaminant thresholds. A lead level above 400 ppm indicates the absence of root vegetables. Arsenic above 20 ppm needs raised beds. Salinity higher than 2 dS/m can damage seedlings. Lots of urban gardens pass these. My Brooklyn plot was treated with gypsum before I could even think about growing edibles safely. It is vital to retest after remediation.
pH Scale Interpretation
- Acidic range (pH 4.5-5.5): Ideal for blueberries and azaleas but locks phosphorus availability in soil
- Neutral range (pH 6.0-7.0): Optimal for most vegetables and lawns supporting nutrient uptake
- Alkaline range (pH 7.1-8.5): Suitable for lilacs but binds micronutrients like iron and zinc
- Adjustment: Add agricultural lime per 1,000 square feet (93 m²) to raise pH by 0.5 units
Nutrient Level Indicators
- Deficient (Red): Below optimal range requiring immediate amendment application
- Adequate (Green): Within target range maintaining current gardening practices
- Excessive (Orange): Risk of plant toxicity necessitating reduced fertilizer inputs
- Critical (Black): Toxic concentrations detected requiring soil replacement consideration
Cation Exchange Capacity (CEC)
- Low (1-10): Sandy soil texture requiring frequent light fertilization applications
- Medium (11-20): Loam soil ideal for gardens with seasonal nutrient supplementation
- High (21+): Clay soil holding nutrients well but needing aeration improvements
- Amendment: Add organic matter to increase CEC by approximately 1 point per 1% increase
Organic Matter Percentage
- Poor (<3%): Requires compost addition applying 1-inch layer per growing season
- Adequate (3-5%): Maintain with cover crops or light organic mulching practices
- Optimal (6-10%): Supports microbial activity and enhances water retention capacity
- Excessive (>10%): Rare occurrence potentially indicating oversaturation in containers
Contaminant Thresholds
- Lead: >400 ppm requires raised beds for edible crop cultivation safety
- Arsenic: >20 ppm necessitates phytoremediation plant installation immediately
- Cadmium: >5 ppm demands professional remediation consultation services
- Action: Retest contaminated garden areas annually after amendment applications
Salinity (EC) Levels
- Low (<1 dS/m): Safe for salt-sensitive plants like strawberries and beans
- Moderate (1-2 dS/m): Tolerable for tomatoes but limits seedling establishment
- High (2-4 dS/m): Requires leaching for most vegetables except barley or cotton
- Critical (>4 dS/m): Needs soil replacement or specialized salt-tolerant crops
Soil Amendments Guide
Group "soil amendments" based on their primary role. "pH adjusters" such as lime increase acidity, and sulfur decreases acidity. "Organic matter" amendments, such as compost, build structure. "Texture modifiers" such as perlite create drainage. "Nutrient amendments," such as bone meal, focus on a specific deficiency. Always select amendments carefully based on your soil test results.
For acidic soils, apply lime at 50 lbs. per 1000 ft² (23 kg/93 m²). Use elemental sulfur (10 lbs or 4.5 kg) for alkaline soil conditions. Be cautious not to apply lime near blueberries. Always follow the established recommended rates. Wear gloves and masks when handling concentrated/labeled products, especially sulfur dust. Store dry minimal amendments.
Select amendments for particular crops. Bone meal provides phosphorus for bulbs and tomatoes. Composted manure benefits flowers, but will hurt root crops before harvest (ban the manure). Perlite works in containers, while greensand is beneficial for fruiting crops. I use gypsum every spring in my compacted vegetable beds.
Your safety should be of utmost importance when handling concentrated amendments. Wear a mask and apply wet blood meal to minimize potential dust inhalation. Store mycorrhizal fungi in a refrigerator. Use gloves when handling amendments and never mix amendments. After applying sulfur, wait three weeks before planting sensitive seedlings. By being diligent in your handling of amendments, you ensure both plant and personal safety.
pH Adjusters
- Agricultural lime: Raises pH in acidic soils containing calcium carbonate minerals
- Elemental sulfur: Lowers pH in alkaline soils through gradual microbial oxidation process
- Gypsum: Neutral pH amendment improving soil structure without altering pH balance
- Application: Apply based on soil test recommendations to avoid over-correction issues
Organic Matter Sources
- Compost: Finished plant-based compost improves water retention and beneficial microbial activity
- Manure: Aged animal manure provides slow-release nitrogen and phosphorus for gardens
- Leaf mold: Decomposed leaves enhance soil structure particularly in woodland garden settings
- Safety: Use only fully decomposed materials to prevent plant burn and pathogen transmission
Macronutrient Boosters
- Blood meal: Fast-acting nitrogen source ideal for leafy vegetables and lawn applications
- Bone meal: Phosphorus-rich amendment essential for root crops and flowering plants
- Greensand: Potassium source with trace minerals beneficial for fruiting plants and trees
- Timing: Apply at planting or during active vegetative growth phases for best results
Texture Modifiers
- Coarse sand: Improves drainage in heavy clay soils when mixed to adequate depth
- Perlite: Volcanic glass increasing aeration in container mixes and seed starting media
- Vermiculite: Retains moisture in sandy soils while providing magnesium supplementation
- Biochar: Porous carbon enhancing water retention and microbial habitat in poor soils
Microbial Enhancers
- Worm castings: Rich in beneficial microbes and natural plant growth hormone compounds
- Compost tea: Liquid inoculant boosting soil biology when sprayed on plant root zones
- Mycorrhizal fungi: Symbiotic root helpers improving nutrient uptake efficiency dramatically
- Storage: Keep refrigerated and use before expiration date to maintain viability
5 Common Myths
A single analysis of garden soil will provide lifetime reliable information on the nutrient status and fertility conditions of the soil.
Soil composition varies each year as plants take up nutrients, weather erodes the soil, and amendments are applied, so it is prudent to retest the soil every 2-3 years to ensure accurate fertility management. Annual variations in garden conditions and how one works the garden and soils can continually change pH balance and organic matter levels, so relying on a single test will become outdated quickly for effective long-term garden planning and amendment decisions.
All commercial fertilizers are similarly effective in addressing nutrient deficiencies in any soil, regardless of either texture or composition.
However, different soil textures hold or release nutrients at different rates. Sandy soils leach nitrogen rapidly, while clay tightly binds phosphorous. Because of these interactions, fertilizers may not be as efficient. The efficiency of the product is highly dependent on applying the one or more specific formulations (i.e., immediate-release versus slow-release) based on soil CEC values and the ordering of stages of plant growth, demonstrating the need for tailored products based on testing versus general application to achieve the desired products in the right condition for intended results.
Whether or not there is already organic matter in the soil, adding additional compost always enhances the health of the soil.
When organic matter levels exceed 10%, anaerobic conditions can occur which can lead to root diseases and create an imbalance of nutrients due to uncontrolled nitrogen mineralization. When containers are excessively saturated, particularly for long periods, oxygen available to root systems is significantly impaired. Therefore, you should only add compost when soil tests indicate that soil organic matter is less than 5% organic matter to promote healthy microbial populations and plant safety.
DIY soil tests are equally reliable as laboratory analysis for detecting dangerous contaminants like lead at hazardous concentrations.
Home testing kits lack the sensitivity to detect heavy metals below critical thresholds and cannot quantify exact concentrations of lead, arsenic or cadmium with laboratory precision. Professional facilities use advanced mass spectrometry to identify contaminants at parts-per-million accuracy, which is essential for food safety assurance in urban gardens where soil may contain historical industrial pollutants requiring remediation.
Soil color can be a reliable indicator of fertility quality without using any scientific testing methods or expert analysis.
Dark soils may possess organic matter, but soil color can be misleading because mineral oxides, such as iron, are the basis of red soil hues completely contrary to nutrient availability. Only an actual determination of a soil's fertility can be done by determining actual nutrient concentrations, pH stability, and CEC capacity - criteria that you cannot visually inspect but laboratories can reliably quantify using scientifically valid chemical extractions and spectrometry analytical techniques.
Conclusion
Soil testing is at the heart of every successful garden. It shows you exactly what your plants require. You don't waste money on unnecessary fertilizers. You protect the environment from runoff pollution. Testing gives your garden the greatest opportunity to thrive season after season.
For optimal outcomes, follow this process: start with DIY texture tests in your garden, then submit samples for lab analysis, study your report carefully, and make accurate amendments. This process works to resolve issues before plant damage occurs.
Regular testing is a long-term resource saver. You save on water because you've learned how to drain effectively. You save on fertilizer because you're applying only what the plants require. Healthier plants, of course, are more pest-resistant. Less effort yields more in the garden. My tested beds now produce double the tomatoes.
Embark on your soil health journey today. Visit your local garden center and pick up a pH test kit for under $10. Test one bed this weekend. Soil knowledge is the key to gardening success. Your plants will thank you with vigorous growth and plenty of fruit.
External Sources
Frequently Asked Questions
What is the best way to test garden soil?
Combine DIY texture tests with professional lab analysis for comprehensive results. Start with simple at-home squeeze tests to evaluate composition, then submit samples to a laboratory for precise nutrient and contaminant measurements.
Can I accurately test soil myself without kits?
While basic texture and pH tests can be performed with household items, they provide limited insights. DIY methods like the jar sedimentation test or vinegar reaction only offer approximate readings compared to laboratory instrumentation.
How do I recognize unhealthy garden soil?
Unhealthy soil exhibits multiple visible and plant-based indicators:
- Poor drainage with standing water after rain
- Crusty surface or extreme compaction
- Stunted plant growth and yellowing leaves
- Persistent weed or moss proliferation
What factors affect soil testing costs?
Testing expenses vary based on these key considerations:
- Basic nutrient panels versus heavy metal screening
- University extension services versus private labs
- Geographical shipping distances for samples
- Turnaround time requirements
How often should garden soil be tested?
Conduct comprehensive testing every 2-3 growing seasons since nutrient depletion and pH shifts occur continuously. Test more frequently when correcting imbalances, establishing new beds, or noticing crop health issues.
What natural methods adjust soil pH?
Use these organic amendments to safely modify acidity:
- Elemental sulfur to lower alkaline pH
- Agricultural lime to raise acidic pH
- Wood ash for gradual pH elevation
- Pine needles for mild acidification
Are store-bought test kits reliable?
Commercial kits give rough estimates but lack laboratory precision. They may detect extreme pH or nutrient deficiencies but cannot quantify contaminants or provide calibrated amendment recommendations like professional analyses.
When is the optimal season for soil testing?
Test several weeks before planting seasons to allow amendment incorporation. Avoid frozen or saturated conditions. Late fall or early spring provides ideal timing for most climate zones.
How do I collect proper soil samples?
Follow these collection protocols for accurate results:
- Use clean tools to prevent contamination
- Sample multiple locations in zigzag patterns
- Take slices at root-zone depths
- Combine subsamples in plastic buckets
What amendments improve poor soil quality?
Tailor amendments to test results:
- Compost for organic matter deficiency
- Gypsum for compacted clay structure
- Greensand for potassium shortages
- Mycorrhizal inoculants for microbial activity