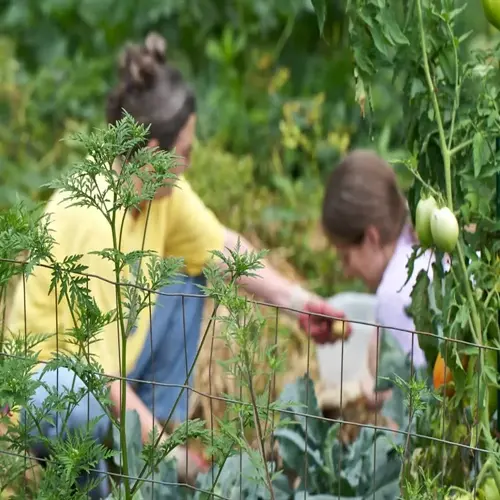

Knowing when to harvest radishes sets a crunchy, spicy treat apart from a woody bust. Radishes are perfect starter crops for novice green thumbs, as they mature quickly and are forgiving. I quickly learned that timing them had a direct effect on taste and texture. If you pick them too early, they don't pack the punch. If you like them too late, they go pithy.
This guide will show you three clear and certain signs that radishes are ready. We will discuss root shoulder, leaf development, and timeline. Additionally, you will find easy fixes for problems such as cracking and bolting. These tips are based on years of growing radishes in home gardens.
Troubleshooting Common Issues
Radish issues often stem from temperature extremes. If it's hot, above 75°F, the roots become woody and have a bitter taste. If it gets cold, below 50°F, radishes will stop growing, as if someone had hit the pause button on a radio. I've even lost a crop of radishes due to unexpected frost because I ignored the weather forecast. I won't let that happen again. Protect your seedlings with a row cover if there is an expected temperature change.
Organic pest control is as simple as companion planting. Marigolds will repel root maggots, while nasturtiums will deter aphids. A garlic spray solution can be effective against flea beetles. Handpicking cabbage worms early in the morning, when they are sleeping, will prevent damage to your crops. I used these alternatives last year and was able to save my radishes from almost destruction.
You can avoid harvest timing dilemmas by monitoring soil moisture every day. Go ahead and use your finger to test the moisture at a depth of two inches. Thin out seedlings when they emerge to prevent crowding. Complete succession plantings every two weeks. Make some notes of maturity dates on your calendar. With these simple tips, you'll consistently enjoy perfect harvests.
No bulbs forming
- Cause: Overcrowded seedlings with spacing under 3 inches (7.6 cm) between plants
- Solution: Thin seedlings to 3 inches apart when they reach 2 inches (5 cm) tall
- Cause: Compacted soil preventing proper root expansion underground
- Solution: Till soil 8 inches (20 cm) deep before planting and remove rocks
- Cause: High temperatures above 65°F (18°C) during growth period
- Solution: Plant during cooler seasons or use shade cloth protection
Premature bolting
- Cause: Exposure to temperatures above 65°F (18°C) triggering early flowering
- Solution: Plant only during cool seasons with consistent moisture levels
- Cause: Insufficient watering during dry periods causing plant stress
- Solution: Maintain even soil moisture with daily watering routines
- Cause: Extended daylight hours during summer months accelerating growth
- Solution: Use 30% shade cloth during peak afternoon sunlight hours
Roots cracking
- Cause: Irregular watering schedules leading to sudden root expansion
- Solution: Water deeply every morning using consistent irrigation methods
- Cause: Overripe radishes left too long in garden beds
- Solution: Harvest promptly when shoulders reach 1 inch (2.5 cm) diameter
- Cause: Excess nitrogen fertilization encouraging rapid but weak growth
- Solution: Apply low-nitrogen compost before planting; avoid nitrogen supplements
Poor germination
- Cause: Soil temperatures below 50°F (10°C) slowing seed activation
- Solution: Pre-warm soil with black plastic for 4-5 days before sowing
- Cause: Planting seeds deeper than ½ inch (1.3 cm) in heavy soil
- Solution: Sow seeds at shallow depth in loose, sandy soil conditions
- Cause: Old seeds with reduced viability stored over 3 years
- Solution: Use fresh seeds with high germination rates each season
Leaf discoloration
- Cause: Magnesium deficiency showing as yellowing between leaf veins
- Solution: Apply Epsom salt solution (1 tbsp per gallon/15ml per 4L)
- Cause: Cabbage looper larvae chewing irregular holes in foliage
- Solution: Handpick pests or apply Bacillus thuringiensis organic spray
- Cause: Downy mildew fungus thriving in cool, damp conditions
- Solution: Space plants for air circulation and water at soil level
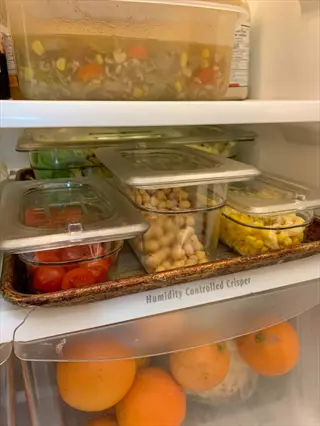
Storing Radishes for Freshness
Process radishes within 24 hours for optimal results. Remove greens as soon as possible to prevent moisture loss from the roots. I learned the hard way that processing them late made the radishes limp. Unwashed roots can be stored in perforated plastic bags. Store at 32-40°F (0-4°C).
In short-term storage, radishes can be kept in mason jars with cold water, changing the water every two days; this will keep the radishes crisp for about three weeks. For long-term storage, layer the roots in damp sand in wooden crates, maintaining a humidity level of ~90-95% at a temperature of 32-40°F (0-4°C).
Storage spaces should always be accurately measured. Use containers that are at least 6 inches (15 cm) deep for storing sand as well. Folded paper towels placed in the bags will absorb moisture. Leave ½ inch (1.3 cm) headspace in freezer containers. Flavor preservation is always better than long-term storage.

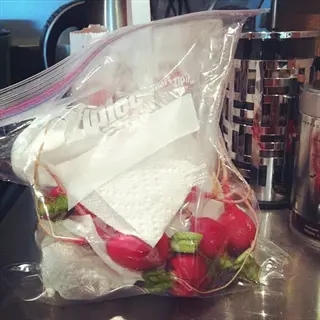
Refrigerator Bag Method
- Process: Immediately after harvesting radishes, remove all green tops to prevent moisture loss from the edible roots
- Duration: Store unwashed radishes in perforated plastic bags maintaining refrigerator temperatures between 32-40°F (0-4°C)
- Conditions: Moderate humidity levels should be maintained consistently to preserve the crisp texture and peppery flavor
- Tip: Place a folded paper towel inside the storage bag to absorb excess moisture and prevent premature spoilage issues
- Flavor Impact: This method preserves the characteristic sharp bite and crunchy texture best suited for raw consumption
- Visual Check: Carefully inspect roots weekly and discard any specimens developing soft spots or dark discolorations
Water Jar Method
- Process: Thoroughly clean harvested radishes before submerging them completely in mason jars filled with cold water
- Duration: Replace the water completely every 48 hours extending freshness for approximately three weeks maximum
- Conditions: Ideal refrigerator temperatures range between 34-38°F (1-3°C) away from ethylene-producing fruits like apples
- Tip: Add several ice cubes during each water change cycle to maintain optimal 35°F (2°C) storage conditions
- Flavor Impact: Water storage gradually mellows the peppery intensity while enhancing the characteristic juicy crispness
- Visual Check: Immediately replace water if cloudiness appears or floating particles become visible in the container
Root Cellar Method
- Process: Layer unwashed radishes with slightly damp sand inside wooden crates allowing moderate air circulation
- Duration: Maintain freshness for 2-3 months in environments with constant 90-95% humidity levels throughout storage
- Conditions: Consistent temperature maintenance between 32-40°F (0-4°C) prevents shriveling and texture degradation
- Tip: Separate different radish varieties into distinct containers and conduct monthly inspections for quality control
- Flavor Impact: Extended storage develops sweeter milder flavor profiles suitable for roasting or inclusion in stews
- Visual Check: Promptly remove any softening roots to protect neighboring produce from potential mold contamination
Countertop Storage
- Process: Place freshly harvested radishes with intact greens in a shallow water-filled bowl on your countertop
- Duration: Maintain freshness for 3-5 days maximum when stored away from direct sunlight and heat sources
- Conditions: Room temperatures should remain below 70°F (21°C) with daily water changes for optimal hydration
- Tip: Mist greens twice daily using a spray bottle to prevent wilting and preserve their nutritional value
- Flavor Impact: Provides crisp texture with full-intensity peppery flavor best consumed within the first 48 hours
- Visual Check: Discard if greens show significant wilting or roots develop any softness or spongy texture

Freezing Method
- Process: Blanch sliced radishes in boiling water for two minutes before flash freezing on baking sheets
- Duration: Store frozen radishes in airtight containers maintaining quality for eight to ten months maximum
- Conditions: Keep freezer temperatures consistently at 0°F (-18°C) to prevent freezer burn and texture damage
- Tip: Leave ½ inch (1.3 cm) headspace in containers to accommodate expansion during freezing process
- Flavor Impact: Frozen radishes develop softer textures suitable only for cooked applications like soups or stir-fries
- Visual Check: Discard if ice crystals form inside container or radishes show significant discoloration changes
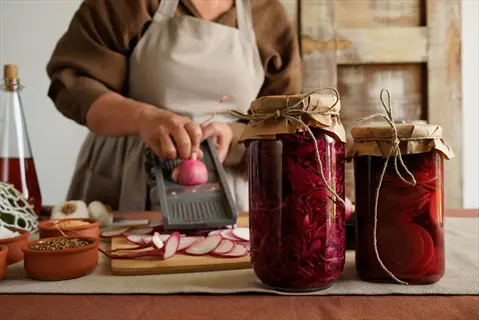
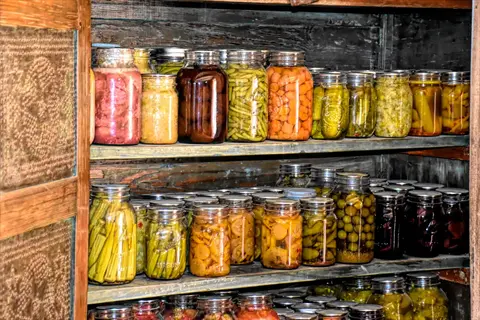
Pickling Method
- Process: Submerge sliced radishes in vinegar brine solution using sterilized glass canning jars with tight lids
- Duration: Refrigerated pickled radishes maintain quality for three to four months after initial processing
- Conditions: Store jars at consistent 38-42°F (3-6°C) temperatures to preserve crispness and flavor balance
- Tip: Add mustard seeds or dill sprigs to brine for enhanced flavor complexity and visual presentation
- Flavor Impact: Vinegar brine transforms radishes into tangy crunchy condiments with reduced natural peppery notes
- Visual Check: Discard if brine becomes cloudy or jar lids show signs of bulging indicating spoilage issues
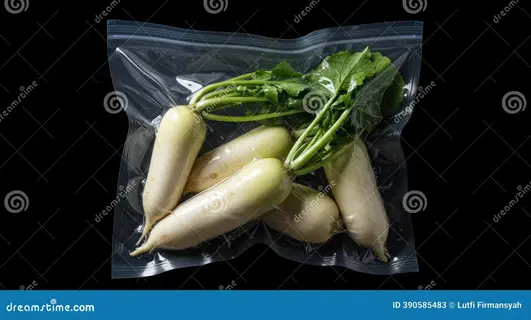
Vacuum Sealing
- Process: Remove greens and dry radishes thoroughly before vacuum sealing in specialized plastic bags
- Duration: Extends refrigerator storage to four weeks while maintaining crisp texture and vibrant color
- Conditions: Maintain refrigerator temperatures between 34-36°F (1-2°C) for optimal preservation results
- Tip: Include oxygen absorber packets inside vacuum bags to prevent oxidation and discoloration issues
- Flavor Impact: Preserves natural peppery flavor better than conventional bag methods with minimal texture loss
- Visual Check: Inspect bags weekly for air leakage or liquid accumulation indicating seal failure problems
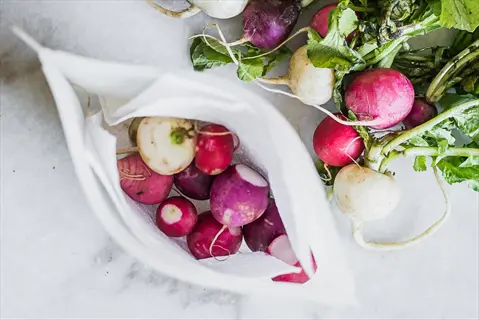
Hydrating Cloth Wrap
- Process: Wrap cleaned radishes in slightly damp linen towels before placing in perforated plastic containers
- Duration: Maintains freshness for 10-14 days when stored in refrigerator crisper drawers at high humidity
- Conditions: Ideal humidity levels between 90-95% prevent dehydration while allowing necessary air circulation
- Tip: Re-dampen cloth every three days using filtered water to maintain consistent moisture levels
- Flavor Impact: Preserves crispness nearly as effectively as water storage with more convenient access
- Visual Check: Replace cloth immediately if mildew spots appear or radishes show shriveling signs
Sand Storage Alternative
- Process: Bury unwashed radishes in containers filled with slightly moistened horticultural sand or vermiculite
- Duration: Maintains quality for eight weeks when stored in cool dark locations around 40°F (4°C)
- Conditions: Ensure storage medium remains barely moist without becoming waterlogged to prevent rot issues
- Tip: Layer radishes carefully ensuring no roots touch each other to prevent pressure bruising damage
- Flavor Impact: Develops concentrated sweetness similar to root cellar storage with firmer texture retention
- Visual Check: Inspect monthly removing any radishes showing soft spots or fungal growth immediately
Crisper Drawer Strategy
- Process: Store trimmed radishes loose in high-humidity crisper drawers without any additional packaging
- Duration: Preserves quality for seven to ten days with minimal preparation requirements for daily use
- Conditions: Adjust drawer vents to maximum humidity settings maintaining consistent refrigerator temperatures
- Tip: Place radishes on top of other vegetables to prevent bruising from heavier produce items
- Flavor Impact: Maintains natural peppery flavor intensity though texture begins declining after one week
- Visual Check: Remove any softening radishes immediately to prevent ethylene gas acceleration of spoilage
What If Radishes Overripen
Salvageable radishes are slightly spongy but not moldy. Remove any small, soft spots immediately. Radishes that are hollow in the center or have cracks all the way are not salvageable. I have saved a whole batch after trimming damaged parts within a few hours. If they are slimy or have an unpleasant odor, discard them.
Roast overgrown radishes at 400°F (200°C) for 25 minutes. This helps to caramelize their sugars and soften any tough woodiness. To stew, simmer in broth at 180°F (82°C) for 15 minutes. Pickling in vinegar brine will mellow any bitterness within 48 hours.
Using unsalvageable radishes in compost tea.Just chop and steep in water for a nutrient-dense fertilizer. You can also feed the chopped roots to the chickens to provide some extra hydration. Additionally, save the seeds if they are bolting for next season. These alternatives can help reduce waste and support your garden's ecosystem.
Identification Signs
- Woody Texture: Roots develop tough fibrous interior with hollow centers when sliced open
- Bitter Flavor: Increased pungency overwhelms natural peppery notes making raw consumption unpleasant
- Spongy Feel: Soft spots develop under pressure indicating cellular breakdown and moisture loss
- Cracked Skin: Surface splits reveal dry interior unsuitable for fresh applications
Cooking Transformations
- Roasting: Cook whole radishes at 400°F (200°C) for 25 minutes to caramelize natural sugars
- Stewing: Simmer sliced radishes in broths for 15 minutes to soften fibrous textures completely
- Mashing: Boil overripe radishes until fork-tender then blend with potatoes for peppery mash
- Pickling: Preserve in vinegar brine for 48 hours to mellow bitterness through acidification
Nutritional Uses
- Greens Pesto: Blend overripe radish greens with nuts/oil despite root quality issues
- Compost Tea: Steep chopped radishes in water for nutrient-rich plant fertilizer solution
- Chicken Feed: Supplement poultry diets with chopped radishes providing hydration and fiber
- Seed Saving: Collect seeds from bolted plants for future planting seasons
Prevention Methods
- Soil Monitoring: Check moisture daily using finger test to maintain consistent hydration levels
- Shade Cloths: Install 30% shade fabric when temperatures exceed 65°F (18°C)
- Succession Planting: Sow new seeds every 14 days to ensure continuous harvest availability
- Variety Selection: Grow slower-bolting types like 'French Breakfast' for extended harvest windows
Texture Rescue Techniques
- Brining: Soak sliced radishes in saltwater solution for 2 hours to restore crispness
- Ice Bath Shock: Submerge radishes in ice water for 30 minutes before cooking applications
- Dehydration: Thinly slice and dry at 135°F (57°C) for crispy radish chips alternative
- Pureeing: Blend cooked radishes into soups or sauces to mask undesirable textures
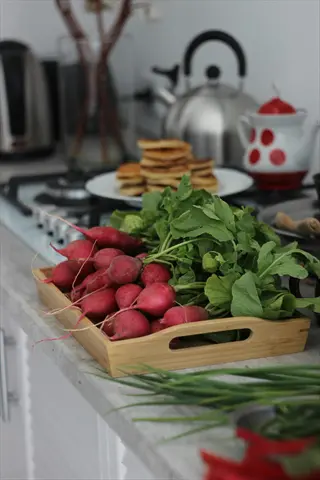
Harvesting Techniques
Harvesting times are notably different for different radish types. Cherry Belle varieties peak in harvest at 22 days and Daikon needs 60 days. Spring radishes will reach maturity faster in cooler temperatures. Winter types like Watermelon radishes do best when the fall temperatures are under 65°F (18°C). I find it helps when I mark my calendar when I planted radishes so I know each radish variety's timing.
Use the right harvesting tools to minimize damage. Loosen soil using a garden fork 6 inches (15 cm) from the roots of plants. Grab the greens at the base with a firm grip and pull straight up. If the roots are stuck, gently rock the plant side to side or try using a hori-hori knife. I always keep my nails trimmed to avoid breaking the skin.
Check the soil moisture at a 40% dampness level before harvesting. Do the finger test: soil should clump and not drip. Harvest before 10 AM when root moisture is optimum (85-90%). If using immediately, wash them by rinsing gently. If for storage, brush the dirt off without washing. It is best to process the harvest within a couple of hours for optimal texture.
Timing Considerations
- Morning Harvest: Collect radishes before 10 AM when root moisture peaks at 85-90% by weight
- Post-Rain Delay: Wait 24 hours after heavy rainfall to allow excess soil moisture drainage
- Variety Differences: Harvest cherry belle at 22 days vs daikon at 60 days maturity markers
- Moon Phase Tip: Traditional gardeners recommend harvesting during waning moon phases
Pulling Technique
- Soil Preparation: Loosen soil with garden fork 6 inches (15 cm) away from plants before pulling
- Grip Method: Grasp radish greens at base and pull straight upward with steady pressure
- Resistance Handling: Wiggle gently side-to-side if roots resist to break soil adhesion
- Tool Alternative: Use hori-hori knife to dig carefully around stubborn roots when needed
Damage Prevention
- Nail Maintenance: Keep fingernails trimmed to avoid piercing root skin
- Hand Positioning: Support root shoulders with opposite hand while pulling greens
- Crowding Solution: Harvest every other radish to create space for remaining plants
- Soil Moisture: Maintain 40% moisture level (damp but not muddy) measured by squeeze test
Variety-Specific Handling
- Small Radishes: Harvest cherry belle at 1 inch (2.5 cm) diameter
- Large Varieties: Harvest daikon at 1.5-2 inches (3.8-5 cm) diameter
- Winter Radishes: Use digging fork for deep-pulling long-rooted varieties carefully
- Pod Producers: Handle rat's tail radishes gently to preserve edible pods
Field Processing
- In-Garden Trimming: Remove greens immediately using sharp scissors at soil line
- Soil Removal: Brush off loose dirt gently - avoid washing until consumption
- Sorting Protocol: Separate damaged roots immediately to prevent spoilage spread
- Sun Protection: Place harvested roots in shaded containers within 5 minutes
3 Signs Your Radishes Are Ready
The first indication is days to maturity matching. Check seed packets for your specific variety. Cherry Belle requires 22-28 days to mature. Watermelon radishes need 55-60 days. Make a cold weather adjustment below 50°F (10°C) by adding 5-7 days. Hot weather above 75°F (24°C) will accelerate growth, but excessive heat will lead to bitterness. I keep a meticulous record of planting dates to avoid the guesswork.
Foliage growth indicates root readiness due to leaf height. Measure from the soil to the leaf tip in inches. Cherry Belle is ready at 4-5 inches (10-13 cm); Daikon is prepared at 6-8 inches (15-20 cm). Count 6-8 true leaves per plant. Deep green color is perfect timing. Light green/yellow leaves signal overripening. Nitrogen over-application produces dark, lush tops with poor root development.
Root shoulder visibility is the truest indicator. Lightly brush soil away to measure the shoulder diameter. Cherry Belle should have ¾-inch (1.9cm) shoulders, and Watermelon will have 2-inch (5cm) shoulders, with a light squeeze to test for firmness. Heat will create shoulder visibility faster, but there is a risk for pithy radishes. If it is dry, the shoulders will appear more quickly than if it is moist.
Days to Maturity Alignment
- Seed Packet Reference: Compare actual growth days against variety-specific guidelines (typically 21-45 days)
- Weather Adjustment: Add 5-7 days for temperatures below 50°F (10°C) or excessive rainfall periods
- Variety Variance: French breakfast matures in 22-28 days while watermelon radish requires 55-60 days
- Growth Tracking: Mark planting dates on calendar and monitor development weekly
- Fall vs Spring: Cool-season varieties mature faster in fall than identical spring plantings
- Confirmation Test: Sample one radish when reaching 80% of packet maturity timeframe
Foliage Development
- Height Measurement: Healthy roots correlate with 4-8 inch (10-20 cm) leafy tops measuring from soil surface
- Leaf Count Indicator: Mature radishes typically develop 6-8 true leaves per plant with deep green coloration
- Asymmetry Warning: Single oversized plant often indicates poor root development below soil
- Variety Differences: Cherry Belle shows readiness at 4-5 inches while Daikon requires 6-8 inch tops
- Environmental Impact: Excess nitrogen creates lush leaves but stunted roots - trust size over foliage
- Consistency Check: Uniform canopy height across planting indicates synchronized maturity
Root Shoulder Visibility
- Soil Surface Check: Gently brush soil away to expose top ¼ inch (0.6 cm) of root circumference
- Diameter Test: Shoulders should measure ¾-1 inch (1.9-2.5 cm) for standard varieties like French Breakfast
- Protrusion Alert: Fully exposed shoulders require immediate harvest to prevent pithiness and cracking
- Texture Assessment: Firm shoulders indicate crispness; sponginess signals overripeness
- Size Variations: Watermelon radish ready at 2 inch shoulders while Cherry Belle at ¾ inch
- Final Verification: Shoulder diameter should match variety's typical mature size when gently squeezed
Seasonal Variations
- Spring Radishes: Faster maturity (3-4 weeks) with smaller size at peak flavor
- Fall Radishes: Slower growth (6-8 weeks) but larger size with sweeter flavor profile
- Temperature Effect: Cool-season radishes develop best below 65°F (18°C)
- Rain Impact: Excessive moisture accelerates leaf growth but may delay root development
Confirmation Testing
- Sample Harvest: Test-pull one radish per variety for size/flavor assessment
- Root Inspection: Cut open sample - solid white flesh indicates perfect maturity
- Taste Verification: Raw radish should have crisp texture with balanced peppery notes
- Bolting Check: Flower buds signal immediate harvest needed to prevent bitterness
5 Common Myths
In order to produce big, beautiful roots to harvest, radishes need a good amount of fertilizer.
Too much fertilizer, especially a nitrogen-rich type, will actually promote leaf growth at the expense of root growth and also increases the risk of bolting. A single application of balanced compost during bed preparation will provide all the necessary nutrition with no cracks or hollow roots. If you put too much fertilizer in, you'll most likely get significant growth on top of the plant and no root develop-ment, especially with quick growing spring varieties like Cherry Belle radishes.
Radish greens are harmful and should be tossed right away when you finish harvesting the root from your garden.
However, radish greens contain significantly higher concentrations of vitamin A, vitamin C, and iron than the roots do. They can be eaten raw in salads for their peppery notes, sautéed with olive oil and garlic and eaten as a side dish, or made into a nutrient-dense pesto by blending them. To toss the greens away is a waste of both a valuable culinary ingredient and valuable nutrients that would typically accompany the harvested roots.
Radishes can only grow successfully during spring planting seasons. They do not tolerate fall conditions at all.
However, many radish varieties such as Watermelon and Daikon actually like cooler temperatures in the fall and develop sweeter flavors and larger roots without stressing them into bolting. In addition, succession planting for radishes from late summer to early fall will provide continuous harvests, even from overwintering varieties that can withstand light frosts. A fall planting will also avoid heat stress that causes spring radishes to become excessively pungent and woody as they grow.
Generally, larger radishes are better quality, and it is best to allow them to grow longer so they reach a larger size.
Larger radishes can become woody, hollow, and bitter, even if they are in the April Planting Series. The best time to harvest roots is at the specific size for the variety. For example, Cherry Belle radishes are best harvested at 1 inch, and Watermelon variety radishes are better around 2 inches. If a radish is too mature, the root or cellular breakdown will begin to dilute the flavor and texture very quickly.
Radishes must be exposed to full sun all day so they can grow healthy edible roots.
Although they like at least 6 hours of sun, they can develop healthy roots with only 4 hours of sunlight, especially in warmer temperatures, where shade can prevent the plants from flowering before being harvested. Partial shade also improves the quality of heat-sensitive varieties like French Breakfast when it is most hot in the afternoon. Too much sun when the temperature is 70° and over will cause plants to bolt early and roots to go bad.
Conclusion
The right time to harvest is crucial for maintaining radish quality. Reaching peak maturity will yield a nice, crisp texture and a balanced flavor. If you wait even a day or two longer, they become woody and bitter. From my experience, the difference is nearly dramatic when harvesting fresh from your garden versus the ones you buy.
Correct storage holds garden freshness. Take the greens right away and refrigerate them with damp paper towels. For short-term crispiness, use jars with water. For the long term, consider storing sand. These are way better at maintaining flavor than plastic from the grocery store.
Be adventurous and try mixing radish varieties by season. The spring Cherry Belle offers a fast, spicy crunch, as does the fall Watermelon radish; however, the Watermelon radish takes longer to develop some sweetness. The winter daikon radish plants can withstand frost. Each variety has its own distinctive flavor and texture. I typically plant three different kinds of radishes each year to have staggered harvests.
Homegrown radishes are just better. You can pick the moment you harvest them for the best texture. Nothing is quite like harvesting fresh roots from your own soil. Grow Cherry Belle radishes this next season, and you'll notice the difference in incredible flavor immediately!
External Sources
Frequently Asked Questions
How can I tell when radishes are ready for harvest?
Radishes show readiness through three clear signs: root shoulders visible at soil surface reaching variety-specific size, leafy tops measuring 4-8 inches tall, and alignment with seed packet maturity dates adjusted for weather conditions.
What occurs if radishes remain in the ground too long?
Overripe radishes develop woody textures, hollow centers, and intensely bitter flavors. They become spongy and crack open, losing culinary value. Immediate harvesting at maturity prevents these texture and flavor deterioration issues.
Should radish greens be removed immediately after harvest?
Yes, remove greens within 24 hours to prevent moisture loss from roots. However, greens remain edible and nutrient-rich. Use them in pesto or sautéed dishes separately from stored roots.
Can radishes survive frost conditions in gardens?
Certain varieties tolerate light frosts exceptionally well. Winter radishes like Daikon and Watermelon actually develop sweeter flavors after light frost exposure. Spring varieties sustain damage in freezing temperatures.
Why do radishes sometimes fail to form bulbs?
Bulb formation fails due to three primary issues: overcrowded seedlings restricting root expansion, compacted soil preventing downward growth, and high temperatures triggering premature flowering instead of root development.
How should freshly harvested radishes be stored?
Optimal storage methods include:
- Refrigerator bags with paper towels absorbing excess moisture
- Water submersion in jars with 48-hour water changes
- Root cellars layered in damp sand for long-term storage
Can overripe radishes be used in cooking?
Overripe radishes transform well through roasting, stewing, or pickling. These methods soften woody textures and mellow bitterness. Pureeing into soups also masks undesirable qualities while retaining nutritional value.
What sunlight conditions do radishes require?
Radishes need at least 4 hours of direct sunlight daily. They thrive with morning sun and afternoon shade in warm climates. Excessive sun in high temperatures causes premature flowering.
Are radish greens edible and nutritious?
Radish greens contain higher vitamin concentrations than roots. They offer substantial amounts of vitamins A, C, and iron. Use them raw in salads or cooked in nutrient-rich pesto.
How does soil moisture affect radish development?
Consistent moisture prevents cracking and controls pungency. Dry soil causes woody, bitter roots while oversaturation promotes top growth over root formation. Maintain damp but not muddy conditions for optimal development.