
With drought conditions expanding worldwide, water conservation gardening has become a necessity. I've seen community wells run dry during the summer peak season. I recommend using this method to cut your water bill and contribute to healthier plants. Your garden will develop extensive, robust root systems along with a greater resistance to pests. There's an urgent need to save our resources!
You'll find five essential approaches that take effect immediately. Efficient irrigation methods and informed planting choices are also included. Soil improvement methods will make every drop of water count. Rainwater harvesting makes storms an asset. Mulching retains important moisture. All methods maintain environmental stewardship for the next generation.
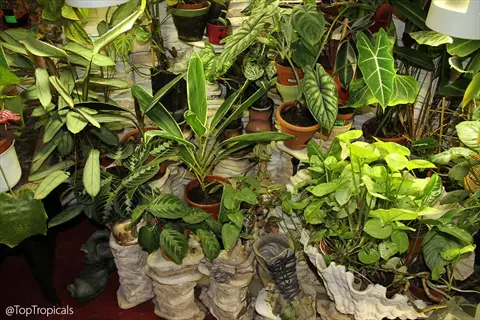
Container Gardening Efficiency
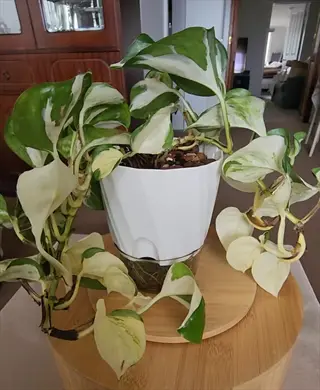
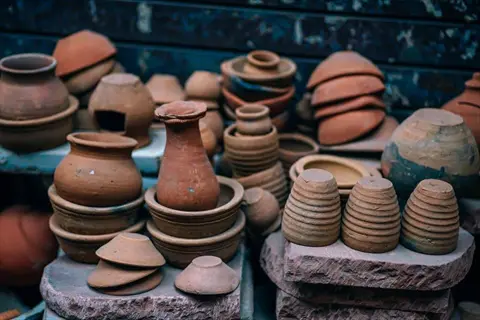
Opt for glazed ceramic pots for container gardening! They retain moisture levels much better than porous materials. I used them for my tomatoes last summer during a heatwave, and they flourished! The glazed surface acts as a barrier to water loss. Terra cotta pots dry out quickly when used for gardening, but they conserve moisture. While keeping plastic containers retains moisture, their roots can overheat without insulation.
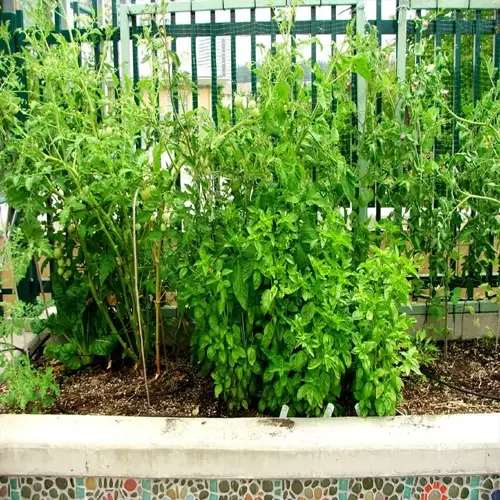
Place your containers in groups. This forms a humid microclimate that decreases evaporation. I group my herb pots near my rain barrel. The humidity they share allows me to water them 30% less frequently than I would otherwise. Always raise containers slightly to allow drainage. Use saucer pots to catch excess water; you can then use it.
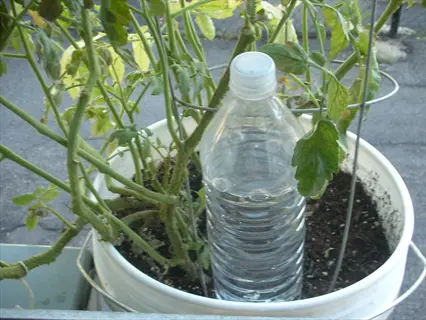
Recycled bottles can be converted into drip jugs. Create a few small holes in the cap. Partially bury the bottle neck just next to the roots of the plant. Fill the bottle with water for a slow release. I do this for my vacation weeks. It provides watering exactly where your plants require it most. A simple system like this conserves watering time by half!
Different materials impact water retention significantly. Metal containers conduct heat and dry soil quickly. Fabric pots require daily watering. Wood boxes work too, if lined correctly. Always match the container material to the plant's watering needs. I can easily monitor each container's needs with my moisture meter.

Glazed Ceramic Pots
- Glazed ceramic containers feature non-porous surfaces that prevent significant moisture evaporation compared to porous alternatives like terracotta pots.
- These specialized pots maintain consistent soil hydration levels ideal for herbs and vegetables requiring regular moisture throughout their growth cycle.
- Select darker glaze colors in cooler climates to absorb beneficial warmth and lighter colors in hot regions to reflect intense sunlight away from roots.
- Ensure adequate drainage holes exist to prevent waterlogging while maintaining optimal moisture retention between watering sessions for maximum plant health.
- Position ceramic containers in wind-protected locations since strong gusts accelerate surface drying despite the glaze's protective qualities against evaporation.
- Regularly remove mineral salt deposits using diluted vinegar solutions to preserve pot integrity and maintain maximum water absorption efficiency over time.
Container Grouping Technique
- Clustering multiple pots closely together creates beneficial humidity pockets that reduce collective water loss through transpiration and evaporation processes.
- Strategically arrange taller plants to provide cooling shade coverage for smaller containers during intense midday sunlight exposure periods.
- Place half-inch thick coconut coir mats between containers to maintain ambient moisture levels while allowing necessary air circulation around roots.
- Rotate container positions weekly ensuring all plants receive balanced light exposure without developing uneven growth patterns or moisture stress.
- Carefully monitor grouped arrangements since high-humidity environments may encourage pest infestations requiring prompt intervention measures.
- Maintain two to three inch gaps between containers balancing humidity benefits with sufficient airflow preventing potential fungal issues development.
DIY Drip Irrigation Jugs
- Repurpose plastic bottles by heating a needle to create precise drainage holes measuring approximately 1/16 inch (1.5 mm) in the base.
- Bury bottles upside-down near plant roots leaving necks exposed above soil for convenient refilling access during early morning hours.
- Use one-liter bottles for small herbs and two-liter containers (67.6 fluid ounces) for larger vegetables needing sustained hydration like tomatoes.
- Adjust hole sizes based on soil composition with smaller holes for sandy soils and larger openings for dense clay substrates.
- Refill bottles between five and seven AM when temperatures remain cooler minimizing evaporation losses during the liquid transfer process.
- Add diluted compost tea monthly delivering nutrients directly to root zones while conserving water through highly targeted application methods.
Self-Watering Containers
- Reservoir systems supply water through capillary wicks maintaining consistent moisture for seven to ten days between refilling cycles.
- Select models featuring transparent water level indicators allowing easy monitoring without disturbing plants or compacting soil structure.
- Use inorganic growing media like perlite or vermiculite ensuring optimal water movement through capillary action within these specialized systems.
- Elevate containers on stands preventing mosquito breeding in stagnant water while improving drainage and air circulation underneath pots.
- Clean reservoirs monthly using three percent hydrogen peroxide solutions controlling algae growth and maintaining long-term system efficiency.
- Combine with soil moisture meters precisely tracking hydration levels between refills ensuring plants never experience damaging water stress conditions.
Pot Size Selection
- Match container volume to plant maturity size preventing undersized pots from drying too rapidly between essential watering sessions.
- Allow two inches (five centimeters) clearance between root balls and container walls ensuring proper moisture distribution throughout the soil.
- Select wider pots rather than deeper ones for most vegetables maximizing soil surface area and moisture retention capabilities effectively.
- Use fabric containers promoting air-pruning benefits that develop denser root systems accessing deeper moisture reserves more efficiently.
- Gradually up-pot plants preventing excessive soil moisture retention around immature roots which could cause rotting issues over time.
- Incorporate water-absorbing polymers following package instructions to extend hydration duration in smaller containers with limited soil volume.
Strategic Placement
- Position containers facing east to receive gentle morning sunlight while gaining valuable afternoon shade protection from intense heat.
- Utilize wheeled plant caddies for relocating containers following seasonal sun angle changes maintaining ideal light conditions year-round.
- Install thirty percent shade cloths during heatwaves reducing container temperatures by fifteen to twenty degrees Fahrenheit (-9 to -6°C).
- Place pots on light-colored surfaces reflecting heat rather than dark asphalt which absorbs thermal radiation increasing evaporation rates.
- Group containers near walls or fences creating natural windbreaks that reduce evaporation rates significantly during breezy weather conditions.
- Monitor microclimates using digital thermometers to identify optimal placement zones maintaining consistent moisture levels for plant health.
Mulching Containers
- Apply one to two inches (2.5 to five centimeters) of organic mulch layers reducing evaporation losses while regulating soil temperatures effectively.
- Use lightweight materials like cocoa hulls or shredded bark avoiding soil compaction issues common in container gardening situations.
- Replenish mulch monthly maintaining consistent coverage depth as natural decomposition processes gradually reduce material volume over time.
- Leave one inch (2.5 centimeters) clearance around plant stems preventing moisture-related rot development issues near vulnerable tissue areas.
- Combine decorative stones with organic mulch enhancing visual appeal while providing additional evaporation protection through layered coverage.
- Avoid fresh grass clippings which generate excessive heat during decomposition potentially harming delicate container root systems over time.
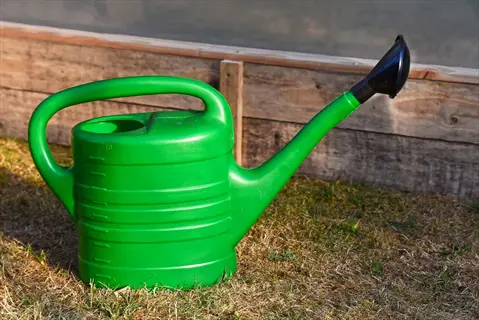
Watering Techniques
- Water between five and seven AM when temperatures remain at their lowest maximizing absorption rates while minimizing evaporation losses significantly.
- Use watering cans featuring long narrow spouts directing water precisely to soil avoiding foliage and reducing potential fungal disease risks.
- Apply liquid slowly until drainage begins ensuring deep root hydration without creating wasteful runoff issues conserving valuable water resources.
- Check moisture at root level using specialized soil probes before watering preventing unnecessary applications and promoting conservation practices.
- Collect drainage water in saucers allowing plants to reabsorb excess within two hours of initial watering application maximizing efficiency.
- Install adjustable drip irrigation systems providing consistent hydration while automating container watering routines for reliable moisture management.
Soil Composition
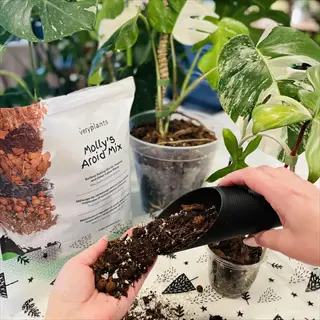
- Combine sixty percent peat-free compost with thirty percent coconut coir and ten percent perlite optimizing water retention properties in containers.
- Incorporate water-storing crystals at planting time following package ratios to extend hydration duration between necessary watering sessions significantly.
- Renew container soil annually maintaining essential moisture-holding capacity and proper nutrient balance required for healthy plant development.
- Mix biochar into potting media improving water retention by approximately eighteen percent through enhanced porous structure and absorption.
- Avoid garden soil in containers preventing compaction issues that reduce drainage efficiency and create problematic waterlogged root conditions.
- Test soil pH monthly since imbalances negatively affect water uptake efficiency requiring timely corrective amendments for optimal plant performance.
Seasonal Adjustments
- Reduce watering frequency by fifty percent during cooler months when plant metabolic activity decreases substantially reducing overall moisture needs.
- Insulate containers with bubble wrap or burlap materials during freezing conditions preventing root damage from extreme temperature fluctuations.
- Relocate containers to sheltered areas during heavy rainfall events avoiding soil saturation issues and potential root rot development problems.
- Gradually increase watering frequency in spring as temperatures rise and new growth emerges requiring more moisture for vigorous development.
- Use humidity trays filled with pebbles and water maintaining ambient moisture levels during dry indoor winter heating conditions effectively.
- Prune container plants strategically reducing foliage mass and corresponding water requirements during natural seasonal dormancy periods.
Rainwater Harvesting Systems
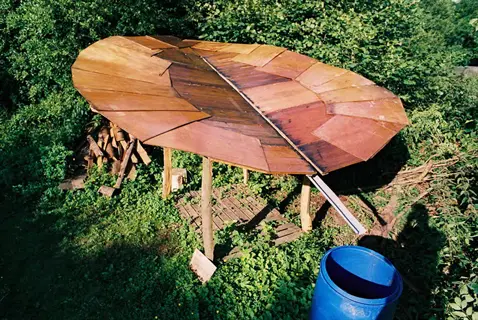
Implement rainwater systems depending on your roof type. Metal roofs require little to no filtering, while asphalt shingle roofs also do not require mesh screens. I put gutter guards on my cottage roof to keep debris out. Flat roofs need a unique angled collector to allow proper drainage. Never forget to slope collection surfaces toward downspouts.
Properly filter your water for the type of garden you have. For ornamental plants, a basic screen is sufficient. Suppose your water catchment system has first-flush diverters. In that case, that's best as it discards any contaminated runoff during the first periods of rain. I use water that filters through activated charcoal for my vegetable garden. In drought emergency conditions, do not use untreated rainwater on edible plants.
When setting up your rainwater storage, be sure to compare options, including rain barrels, underground tanks, and concrete cisterns. A barrel does work for a small garden, but it freezes in winter. I opted for the 500-gallon underground tank, which allows for cooler water storage. Concrete cisterns can help maintain the water temperature naturally. If you are using above-ground tanks, consider the evaporation rates.
Always check your local regulations before installing any system. In many Western states, there are limits on the amounts of water you can collect during drought restrictions. My county requires mosquito-protected containers on any water collection container. Some may require a permit for cisterns that hold more than 200 gallons of water. Always verify the water rights/state statutes with your extension office first.
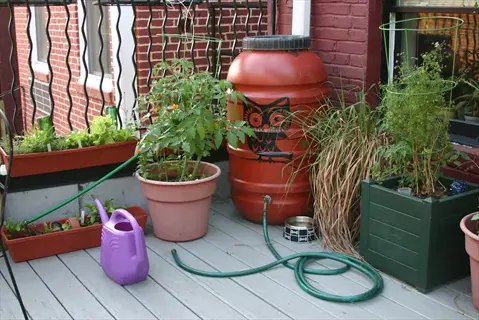
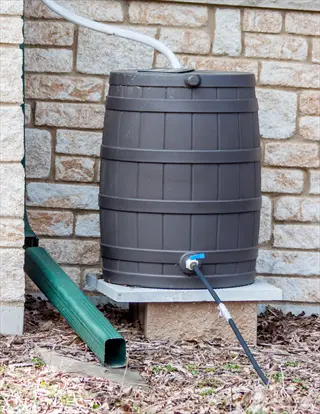
Barrel Collection Systems
- Standard 55-gallon (208 liter) barrels collect approximately 0.5 gallons (1.9 liters) per square foot of roof area during one inch (2.5 cm) of rainfall.
- Position barrels directly beneath downspouts using sturdy platforms elevating containers at least 18 inches (45 cm) for gravity-fed watering access.
- Install fine mesh screens preventing debris and insects from entering while allowing maximum water flow during heavy downpours.
- Connect multiple barrels with specialized linking kits creating larger storage capacities for extended dry periods between rainfall events.
- Use dark-colored barrels inhibiting algae growth and maintaining water quality suitable for ornamental plant irrigation applications.
- Install overflow valves directing excess water away from foundations during torrential rainfall exceeding barrel storage capacities.
DIY Storage Solutions
- Repurpose food-grade containers like 275-gallon (1,040 liter) IBC totes after triple-rinsing with vinegar solutions removing chemical residues.
- Create simple first-flush diverters using PVC pipes eliminating initial runoff containing roof contaminants before storage begins.
- Build attractive wooden enclosures around containers improving aesthetics while providing insulation against temperature fluctuations.
- Install spigots at various heights allowing access for watering cans, hose attachments, or drip irrigation system connections.
- Add aquarium pumps creating pressurized systems enabling sprinkler use without municipal water connections.
- Paint containers with UV-resistant colors preventing plastic degradation while reducing light penetration controlling algae formation.

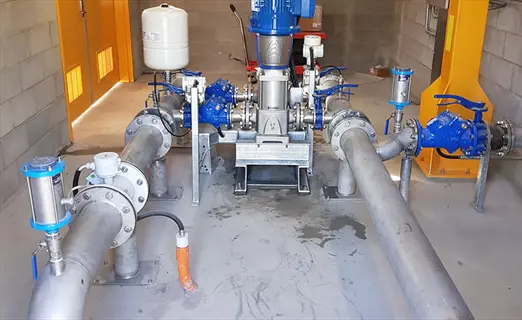
Underground Cisterns
- Large 1,000-5,000 gallon (3,785-18,927 liter) tanks store water below frost lines maintaining cooler temperatures throughout the year.
- Require professional installation with proper excavation, reinforced concrete bases, and secure locking lids preventing contamination.
- Incorporate multi-stage filtration systems including sediment filters, carbon filters, and UV sterilization for potable-grade water quality.
- Connect to irrigation systems using submersible pumps delivering consistent pressure for sprinkler or drip irrigation applications.
- Calculate sizing based on roof catchment area and local rainfall patterns ensuring adequate seasonal water storage capacity.
- Include overflow management systems directing excess water to drainage swales or rain gardens during heavy storm events.
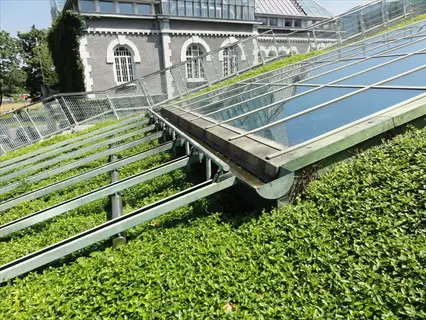
Green Roof Integration
- Layered systems with waterproof membranes, root barriers, and drainage mats capture rainfall while supporting specialized vegetation growth.
- Engineered soil mixtures retain up to seventy percent of rainfall reducing runoff while supplementing plants during dry periods naturally.
- Install advanced moisture sensors activating supplemental irrigation only when soil levels drop below predetermined thresholds.
- Select drought-tolerant sedums and native grasses requiring minimal watering once established on challenging rooftop environments.
- Reduce building cooling energy requirements significantly through natural evapotranspiration processes in urban settings.
- Integrate overflow drains connecting to storage tanks maximizing water capture efficiency during extreme weather conditions.
Purification Techniques
- Basic sediment filters remove leaves and debris providing first-stage protection for storage containers and irrigation equipment.
- Activated carbon filtration systems eliminate organic compounds and unpleasant odors improving water quality for edible plants.
- UV sterilization units destroy ninety-nine point nine percent of pathogens making water safe for vegetable gardens.
- Boiling collected water for five minutes achieves pathogen-free water suitable for delicate seedlings and propagation activities.
- Add one teaspoon (5 milliliters) of household bleach per 10 gallons (38 liters) when contamination suspected for non-edible plants.
- Test water quality annually checking pH, nitrate levels, and bacterial counts ensuring suitability for intended garden applications.

Gutter Modifications
- Install specialized gutter guards preventing leaf accumulation while maintaining maximum water flow during rainfall events.
- Adjust slope angles ensuring one-quarter inch (6 millimeter) drop per 10 feet (3 meters) for optimal drainage toward collection points.
- Use aluminum or stainless steel materials avoiding copper toxicity concerns for edible gardens and sensitive plant varieties.
- Add extension diverters channeling water to multiple collection points across larger garden areas efficiently.
- Create decorative rain chains replacing downspouts with attractive chains slowing water flow while oxygenating collected water.
- Install heat tape systems in freezing climates preventing ice dams that block winter water collection opportunities.

Water Distribution
- Connect barrels to drip irrigation systems using gravity flow requiring one foot (30 centimeter) elevation per 10 feet (3 meters) of hose.
- Use pressure-compensating emitters ensuring consistent output across varying elevations in sloped garden terrain.
- Install timer-controlled pumps enabling automatic dawn irrigation cycles maximizing efficiency without daily manual intervention.
- Employ soaker hoses buried under organic mulch distributing water directly to root zones with minimal evaporation loss.
- Create dedicated irrigation zones separating rainwater systems from municipal supplies preventing cross-contamination risks.
- Implement flow meters tracking usage patterns and calculating water savings for different garden sections accurately.
Seasonal Maintenance
- Drain systems completely before first frost preventing ice damage to containers, pipes, and connection components.
- Disconnect downspout diversions restoring winter drainage away from foundations during potentially damaging freeze-thaw cycles.
- Clean filters and screens monthly during active collection seasons maintaining optimal water flow rates consistently.
- Scrub interior surfaces annually using non-toxic cleaning solutions removing biofilm and mineral deposit accumulations.
- Inspect seals and connection points quarterly replacing worn washers and cracked fittings preventing potential leaks.
- Monitor for mosquito larvae weekly adding Bacillus thuringiensis israelensis dunks as effective biological control.
Legal Considerations
- Research local regulations thoroughly since some arid regions restrict rainwater collection quantities or require special permits.
- Check homeowners association rules regarding visible barrel placement and mandatory screening requirements before installation.
- Understand complex water rights doctrines in western states where prior appropriation systems govern usage allocations.
- Review available tax incentives and rebate programs for installing certified rainwater harvesting systems in qualifying areas.
- Consult building codes for structural requirements when installing large rooftop or underground collection systems safely.
- Document system details including overflow management plans when applying for necessary permits and approvals.
Greywater Integration
- Combine with laundry-to-landscape systems reusing up to 40 gallons (151 liters) per load for appropriate ornamental plants.
- Install branched drain systems distributing shower water to mulch basins around established trees and shrubs efficiently.
- Use plant-based, sodium-free detergents exclusively ensuring compatibility with soil microbiology and plant health requirements.
- Avoid edible plants except fruit trees with drip irrigation placed away from sensitive root collar areas carefully.
- Implement surge tanks balancing variable output from household activities to consistent garden irrigation needs.
- Include accessible inspection ports monitoring system performance and facilitating essential maintenance procedures regularly.
Lawn Reduction Strategies
Traditional lawns require watering all the time, while alternatives, such as clover, or native grasses, require 60% less. My neighbor replaced his Kentucky bluegrass with buffalo grass and now waters monthly instead of weekly. These alternatives develop deep roots and naturally draw moisture from the subsoil.
Begin converting your lawn by killing existing grass with sheet mulching. Place cardboard and compost in the site. Wait six weeks before planting alternatives. For a quicker method, remove the sod by hand. I changed my front yard with this method last spring. It effectively keeps the weeds from returning.
Maintenance disparities are substantial. Traditional lawns require weekly mowing and feeding. Groundcovers such as creeping thyme, on the other hand, only require trimming twice a year. It has been three years since I fertilized my thyme lawn. Water savings are truly dramatic, especially when you consider the cumulative total. Expect to save 30,000 gallons annually for every 1,000 square feet.
Ultimately, visual aesthetics should be prioritized when evaluating alternative landscaping options. For example, wildflower meadows provide brilliant color for seasonality. Gravel gardens create a modern, minimalist environment. My succulent garden provides texture throughout the year. All options offer unique beauty and are eco-friendly in terms of water conservation. Create trails to traverse the various landscaping styles, balancing accessibility and aesthetic appeal.
Preparation Phase
- Soil Testing: Analyze soil composition and pH levels to determine necessary amendments before planting alternatives.
- Grass Removal: Use sheet mulching with cardboard and compost for chemical-free removal or solarization during summer.
- Edge Definition: Install metal or plastic edging to create clean borders between new areas and remaining lawn.
- Soil Amendment: Incorporate three inches of compost to improve drainage and water retention in converted areas.
- Slope Assessment: Evaluate drainage patterns to prevent water pooling in newly converted landscape sections.
- Utility Check: Identify underground utilities before digging to avoid damage during conversion process.
Clover Lawn Installation
- Seed Selection: Choose white Dutch clover at 1-2 ounces per 1,000 square feet (28-57g per 93m²).
- Planting Method: Broadcast seeds evenly over prepared soil and lightly rake for soil contact without deep burial.
- Initial Watering: Maintain consistent moisture for 7-10 days during germination then reduce to weekly watering.
- Fertilization: Avoid nitrogen fertilizers since clover naturally fixes nitrogen from the atmosphere.
- Mowing Schedule: Trim to three inches height once or twice annually to encourage dense growth.
- Overseeding: Apply additional seeds in thin areas during cool spring or fall temperatures.
Native Grass Conversion
- Species Selection: Choose region-appropriate natives like blue grama grass in arid zones.
- Planting Density: Space plugs 12-18 inches apart (30-45cm) allowing natural spreading over seasons.
- Establishment Care: Water deeply twice weekly for first month then reduce to monthly.
- Root Development: Avoid foot traffic during first growing season to establish strong root systems.
- Seasonal Care: Cut back dormant grasses in late winter before new spring growth emerges.
- Pest Management: Use neem oil for occasional aphid control without harming beneficial insects.
Xeriscaping Implementation
- Design Principles: Create zones grouping plants by water needs using boulders and gravel.
- Soil Preparation: Amend with three inches (7.5cm) of compost and install weed barrier fabric.
- Plant Installation: Use drought-tolerant succulents spaced for mature size to minimize gaps.
- Mulch Application: Cover soil with three inches of inorganic mulch like crushed granite.
- Irrigation Planning: Install drip lines with separate zones for different plant water requirements.
- Drainage Solutions: Create swales to direct rainwater toward planting beds during storms.
Maintenance Transition
- Watering Adjustment: Gradually reduce irrigation frequency while monitoring plant health.
- Weed Management: Hand-pull invaders during establishment while groundcovers develop coverage.
- Seasonal Care: Trim woody perennials in late winter and divide groundcovers every 2-3 years.
- Soil Monitoring: Test nutrient levels annually and amend based on specific plant needs.
- Pest Inspection: Check monthly for signs of infestation and use organic treatments as needed.
- Aeration: Use garden forks to decompact soil annually in high-traffic edge areas.
Efficient Irrigation Methods
In terms of efficiency, drip irrigation is the most effective, with a water efficiency of 90-95%, compared to sprinklers, which have a water efficiency of 60-70%. I put drip lines in my vegetable garden last season. Drip irrigation water is delivered directly to your root zone, minimizing evaporation loss. Soaker hoses are an option for flower beds, providing water to the soil with an efficiency of 85-90%.
Installation depends on the type of system. Drip systems require pressure regulators and emitters located at root zones. My small garden took half a day to install. Sprinklers require complicated underground piping and should be installed by professionals. Hand watering does not require any installation, but it is not water-efficient.
Ensure that you maintain your drip systems with regular, preventative maintenance checks on a monthly basis to identify any clogs or leaks. Seasonal flushing of drip lines and filters should typically be replaced once a year. Last summer, I found ants nesting in my emitter. Troubleshooting dry spots can be done by increasing the flow rate from emitters or adding extra lines. Lastly, ensure you periodically pressurize gauges to prevent sudden pressure drops.
The cost can vary significantly depending on the size of your garden. A small garden with soaker hoses will cost under $50. A medium-sized garden will cost $200- $400 for a drip system $200 400. My quarter-acre garden was $1,200 with smart controllers. There will also be long-term water savings that will eventually compensate for your initial costs (approximately 3 seasons).
Drip System Setup
- Layout Planning: Create zone map grouping plants with similar water needs together.
- Component Selection: Use pressure-compensating emitters for sloped areas and adjustable emitters for containers.
- Installation Depth: Bury main lines 4-6 inches deep with emitters at soil surface near root zones.
- Pressure Regulation: Install pressure reducers maintaining optimal 15-30 PSI (1-2 bar) for consistent flow.
- Filter Installation: Use 150-mesh filters preventing clogging from sediment in water sources.
- Zone Separation: Create separate zones for different plant types requiring varied watering schedules.
Smart Controller Setup
- Weather Integration: Connect to local weather stations adjusting schedules based on rainfall and temperature.
- Soil Moisture Sensors: Install at root depth (6-12 inches / 15-30 cm) triggering irrigation only when needed.
- Zone Programming: Set different run times for sun-exposed versus shaded garden areas.
- Flow Monitoring: Add flow meters detecting leaks when usage exceeds programmed parameters.
- Remote Access: Enable smartphone control for manual overrides during unexpected weather changes.
- Seasonal Adjustment: Program automatic seasonal percentage adjustments reducing winter watering.
Maintenance Protocols
- Monthly Inspection: Check for leaks, clogged emitters, and damaged lines during growing season.
- Flushing Procedure: Open end caps flushing debris from lines at season start and after storms.
- Filter Cleaning: Rinse screen filters weekly during peak use and replace annually.
- Emitter Maintenance: Soak clogged emitters in vinegar solution for mineral deposit removal.
- Winterization: Blow out lines with compressed air before first freeze preventing pipe damage.
- Component Replacement: Keep spare emitters, connectors, and pressure regulators for quick repairs.
Water-Saving Techniques
- Cycle and Soak: Program multiple short cycles allowing water absorption in clay soils.
- Deep Watering: Set systems to water deeply 1-2 times weekly encouraging deep root growth.
- Mulch Integration: Cover drip lines with 3 inches (7.5 cm) organic mulch reducing evaporation.
- Check Valve Installation: Prevent low-point drainage maintaining prime in sloped systems.
- Root Zone Targeting: Adjust emitter placement as plants grow keeping water at active roots.
- Rainwater Integration: Connect systems to rain barrels using gravity-fed drip kits.
Troubleshooting Guide
- Low Pressure Issues: Check for kinked lines, clogged filters, or insufficient water source pressure.
- Dry Spots: Increase emitter flow rates or add supplementary emitters in problem areas.
- Overwatering Signs: Reduce run times if plants show yellowing leaves or fungal growth.
- Emitter Clogging: Install additional filtration or flush system more frequently.
- Animal Damage: Protect above-ground components with conduit or bury vulnerable lines.
- Zone Failure: Check solenoids, wiring connections, and controller programming for errors.
Mulching for Maximum Moisture
There is a huge variation in moisture retention between mulch types. Wood chips and cocoa hulls provide the best moisture protection against evaporation. Gravel has moderate moisture retention and straw works well in vegetable beds. Personally, I choose cocoa hulls for my rose garden since they hold moisture like a sponge. The organic nature of the mulch will also promote even greater moisture retention as it decomposes.
Apply mulch at the recommended depth, taking into account the specific area. Leave 3-4 inches for trees and shrubs, but only 1-2 inches for delicate perennials. My vegetable beds benefit from 2-3 inches of straw mulch. For slopes, we reduce the depth to prevent washing out and instead install terraces. Always leave space around the plant stem to prevent it from rotting.
You can maximize the benefit of muklch by making seasonal adjustments. Lay down thick layers of mulch before the summer's heat hits. This will then decompose and thin out, so you'll need to refresh midseason. I've also added additional mulch to overwinter plants, aiding in root insulation. If mulching in the rainy season, avoid compacting it too much for drainage purposes. If it is scorched, add a little more mulch to reduce evaporation.
Steer clear of issues that limit your benefits. Never place mulch on the trunk, which results in volcano mulching. Never use fresh wood chips that immobilize nitrogen as they decompose, as this can hinder plant growth. I discovered that dyed mulches can have a negative impact on soil biology. Always remove weeding barriers that block water access to mulch. Replenish every year to ensure coverage.
Seasonal Timing
- Spring Application: Apply after soil warms to retain moisture during growing season
- Summer Refresh: Replenish thin layers mid-season due to decomposition
- Fall Preparation: Apply protective layer before winter to prevent soil erosion
- Winter Protection: Maintain layer to moderate soil temperature fluctuations
- Rainy Season: Ensure proper depth to prevent soil compaction from heavy rains
- Drought Periods: Increase depth slightly to maximize evaporation protection
Proper Technique
- Soil Preparation: Weed thoroughly and water deeply before application
- Stem Clearance: Leave 1-2 inch (2.5-5 cm) space around plant bases
- Depth Consistency: Maintain even coverage using a rake for uniform depth
- Slope Management: Use terraces on steep slopes to prevent mulch washout
- Edge Definition: Create clean borders with edging materials to contain mulch
- Replenishment: Add fresh mulch annually as decomposition occurs naturally
Water Conservation
- Evaporation Reduction: Proper mulch reduces evaporation by up to 70%
- Rain Capture: Textured mulches slow runoff allowing better water absorption
- Weed Suppression: Block sunlight reducing weed competition for moisture
- Soil Temperature: Maintain cooler summer soil temperatures reducing water needs
- Crust Prevention: Prevent soil surface crusting improving water penetration
- Root Protection: Insulate roots from temperature extremes reducing stress
Problem Solving
- Fungal Issues: Reduce depth and improve air circulation around plants
- Pest Harborage: Avoid thick layers near structures where pests may nest
- Nutrient Tie-up: Balance carbon-rich mulches with nitrogen fertilizers
- Water Repellency: Fluff compacted mulch to restore water penetration
- Algae Growth: Reduce watering frequency or switch to inorganic mulch
- Decomposition Rates: Choose longer-lasting materials like bark nuggets
Special Situations
- Container Plants: Use fine-textured mulches like cocoa hulls or gravel
- Seedling Protection: Apply thin straw layer after germination
- Wet Areas: Use gravel or stone mulch in poorly drained locations
- Fire-Prone Zones: Use inorganic mulches within 5 feet (1.5 m) of structures
- Vegetable Rotation: Incorporate decomposed mulch when rotating beds
- Acid-Loving Plants: Use pine needles or oak leaves to maintain soil pH
Understanding Your Soil Type
The four main types of soil, sandy soil, silty soil, clay soil, and loam, have distinct characteristics and behaviors. Sandy soil is gritty, drains quickly, and doesn't retain moisture. Silty soil is smooth, powdery, and drains moderately. Clay soil is compact, dense, and has slow drainage. Finally, loam is a combination of those three types of soils with the best characteristics for plant growth.
Identify the soil type with simple home tests. The jar test is simply a method of layering soil and water in a clear glass container. The ribbon test can be done by rolling moist soil between your fingers. The drainage test is a percolation test for the soil. For quick pH checks, I use vinegar and baking soda.
Improve each soil type intelligently. Add compost to sandy soils to help them retain water. Incorporate gypsum and coarse sand to improve clay soils. Amend silty soils with organic matter to reduce compaction. Maintain loam soils with a regular supply of compost. I always test before planting season.
Modify watering according to soil types. Water sandy soils frequently, and lightly. Water clay soils deeply and infrequently. Water-silty soils are moderately affected every few days. Loams need ordinary once-a-week irrigation. I check the moisture level at the root level before watering the garden.
Identification Methods
- Jar Test: Layer soil/water in clear container, measure layers after 24 hours
- Ribbon Test: Moisten soil and roll between fingers to assess clay content
- Squeeze Test: Compress moist soil - sandy crumbles, clay holds shape
- Percolation Test: Dig 12-inch (30 cm) hole, time water drainage rate
- pH Testing: Use home test kit or vinegar/baking soda reaction method
- Organic Matter Check: Darker soils typically have higher organic content
Improvement Strategies
- Sandy Soils: Add 3-4 inches (7.5-10 cm) compost annually, use water-absorbing polymers
- Clay Soils: Incorporate gypsum, coarse sand, and organic matter to loosen
- Silty Soils: Add compost for structure, avoid compaction from foot traffic
- All Soils: Maintain 2-3 inch (5-7.5 cm) organic mulch layer to protect soil structure
- Acidic Soils: Apply lime at recommended rates to raise pH gradually
- Alkaline Soils: Amend with sulfur or acidifying organic materials
Watering Techniques
- Sandy Soils: Frequent light watering (every 2-3 days), use drip irrigation
- Clay Soils: Deep infrequent watering (every 7-10 days), allow drying between
- Silty Soils: Moderate watering (every 4-5 days), watch for surface crusting
- Loam Soils: Standard watering (weekly), adjust based on plant needs
- Container Mixes: Water when top inch (2.5 cm) feels dry, ensure good drainage
- Sloped Areas: Use terracing or soaker hoses to prevent runoff
Seasonal Considerations
- Spring Preparation: Test soil before planting season, apply amendments early
- Summer Maintenance: Monitor moisture levels, add mulch to conserve water
- Fall Improvement: Incorporate organic matter before winter for decomposition
- Winter Protection: Cover bare soil with mulch to prevent erosion and compaction
- Drought Conditions: Prioritize deep watering for established plants
- Rainy Periods: Ensure drainage paths to prevent waterlogging issues
Problem Solving
- Compaction: Aerate with garden fork, avoid working wet soil
- Erosion: Plant groundcovers, use terraces on slopes
- Water Repellency: Apply wetting agents, incorporate organic matter
- Nutrient Deficiency: Conduct soil test, amend based on results
- Salt Buildup: Leach with deep watering, improve drainage
- Poor Drainage: Create French drains, raise planting beds
5 Common Myths
In warm conditions, plants benefit from daily watering to stay healthy and avoid wilting
Established plants do much better with deep, infrequent watering every 2-3 days than with daily frequent watering that only penetrates the top layer. The benefit in watering deeper, but less often, is that it sets up a situation for deeper root growth and thus an increase in drought resistance. Watering daily with a light covering of water will only wet the surface soil and promotes shallow rooted growth, which will be susceptible to heat stress. Always check for wetness at the root level before watering to avoid overwatering and use of water unnecessarily.
Once they become established in the garden, drought-tolerant plants will never need additional watering
While drought-tolerant species can tolerate dry periods, they do better with deep watering - i.e., infrequent but with ample water - during extreme droughts or heat waves. Newly planted specimens will require regular watering for 1-2 growing seasons until they develop established root systems. Even mature plants may benefit from a monthly deep watering in periods of exceptional drought to preserve their vitality and flowering potential, but to totally neglect them could irreversibly set them back.
Watering your plants under the burning sun in the middle of the day will promote leaf burn and should be avoided at all costs
The real problem with watering them in the middle of the day is the evaporation rate, not scorching the leaves. Sometimes in fact, water droplets can act as a magnifying lens and it can be scorch leaves, but again, the bigger issue is water wasted(through evaporation) before it even reaches the roots. The best time to water in the morning is if it is cooler, it allows the maximum soil absorption with little evaporation, which makes the most efficient watering time.
Container gardens inherently require more frequent watering than equivalent plants grown in ground soil
Properly designed containers with appropriate soil mixes and mulch can retain moisture as effectively as garden beds. Water needs depend on factors like plant selection, container material, and mulching practices rather than container versus ground planting. Well-designed self-watering containers with reservoir systems may actually conserve water better than some traditional garden beds when maintained correctly.
The brown grass during dry weather means you have a dead lawn that will need to be replaced
The vast majority of turf grasses will acclimate when you experience drought conditions, turning brown as a method of protection and survival. Healthy grass crowns usually remain alive for 4-6 weeks without water. Rather than replacing the grass, use the appropriate recovery system and, once the water is available, ED. adequate water to the area and implement core aeration. Dormancy cultivates plant resources and prevents the long-term damage of excessive water attempts during drought.
Conclusion
We discussed fundamental water conservation gardening techniques that work together. Efficient irrigation techniques and improving soil health are the building blocks of success. Mulching and rainwater harvesting multiply the efficiency. Choosing drought-tolerant plants rounds out the system. Altogether, these techniques form gardens that are durable and can operate with little input.
Sustainable long-term benefits extend beyond the garden. Reducing water usage permanently lowers utility bills. Healthier plant growth requires fewer chemicals. I have witnessed neighborhood ecosystems rejuvenate over the course of three seasons. Practices build soil fertility that compounds year after year. Once you start practicing water conservation gardening, it becomes easier, as nature helps too.
Begin acting now and implementing immediately. Install a rain barrel this weekend. Apply three inches of mulch to the base of existing plants. Test the soil based on the jar method tomorrow. Remove one area of lawn and replace it with native grasses. I made two changes and saw results quickly.
Your actions have a significant impact on the environment. Every gallon saved protects your watershed. Reduced runoff has prevented chemical pollution from reaching downstream areas. The aquifer levels in my community are better off because of widespread applications. Responsible water management sustains entire ecosystems. These actions are providing future generations with thriving ecosystems.
External Sources
Frequently Asked Questions
How can I conserve water in my garden effectively?
Implementing water conservation gardening techniques involves multiple strategies including installing drip irrigation, harvesting rainwater, using drought-tolerant plants, applying thick mulch layers, and grouping plants by water needs. These methods collectively reduce water usage while maintaining healthy plant growth.
What irrigation method saves the most water?
Drip irrigation systems provide the most efficient water delivery directly to plant roots. Key advantages include:
- Minimal evaporation loss compared to sprinklers
- Precise targeting avoiding water waste on non-plant areas
- Customizable flow rates for different plant needs
- Compatibility with rainwater harvesting systems
Can gardens survive without frequent watering?
Properly designed water conservation gardens can thrive with minimal watering through strategic approaches. Selecting drought-tolerant native plants, improving soil water retention with organic matter, and using protective mulches create resilient landscapes needing only occasional deep watering during extreme conditions.
What household water can safely irrigate gardens?
Certain greywater sources can be repurposed with precautions:
- Laundry water (using plant-friendly detergents)
- Shower/bath water (without harsh chemicals)
- Avoid kitchen wastewater containing grease/salts
- Never use water with bleach or disinfectants
- Apply only to ornamental plants, not edibles
Which plants require the least water?
Many beautiful and functional plants thrive with minimal irrigation. Excellent drought-tolerant choices include native grasses, succulent varieties like sedum, Mediterranean herbs such as lavender, and wildflowers adapted to your regional climate conditions.
How does mulching help conserve water?
Mulch significantly reduces garden water needs through multiple mechanisms:
- Blocks soil surface evaporation
- Regulates soil temperature fluctuations
- Prevents weed competition for moisture
- Improves rainwater absorption during storms
- Reduces soil crusting for better water penetration
Can I automate water conservation?
Smart automation systems optimize water conservation gardening effectively. Use weather-based irrigation controllers that adjust schedules to real-time conditions, soil moisture sensors that prevent unnecessary watering, and drip systems with timers to deliver precise amounts at optimal times.
How do I prepare soil for water conservation?
Enhancing soil structure is fundamental for water retention:
- Incorporate compost to improve moisture-holding capacity
- Use cover crops to build organic matter
- Avoid compaction by not working wet soil
- Amend sandy soils with water-absorbing materials
- Maintain proper pH for optimal root function
What's the most overlooked water conservation method?
Proper plant grouping by water needs is frequently underestimated. Creating hydrozones where plants with similar water requirements share irrigation lines prevents overwatering drought-tolerant species while ensuring thirsty plants get adequate moisture without wasting resources.
How can small gardens maximize water conservation?
Compact spaces benefit from focused water conservation gardening techniques:
- Install self-watering containers with reservoirs
- Use vertical planting to reduce ground exposure
- Implement micro-drip irrigation systems
- Apply water-absorbing polymers in containers
- Choose compact drought-tolerant plant varieties